How to Phish with Core Impact

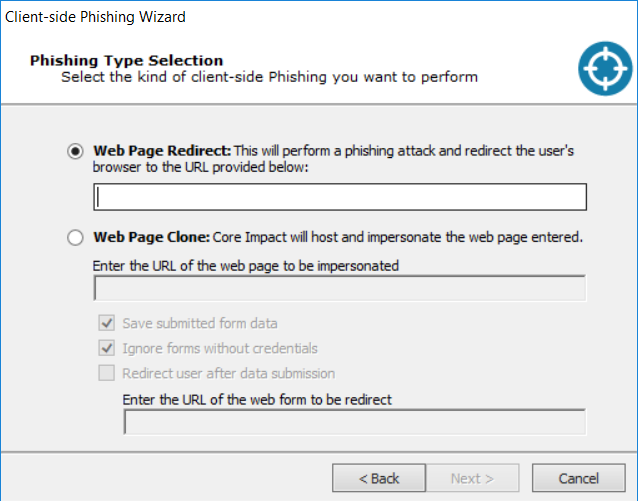
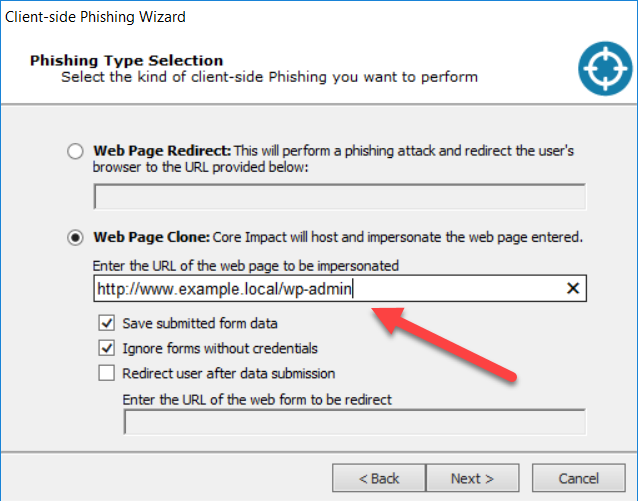
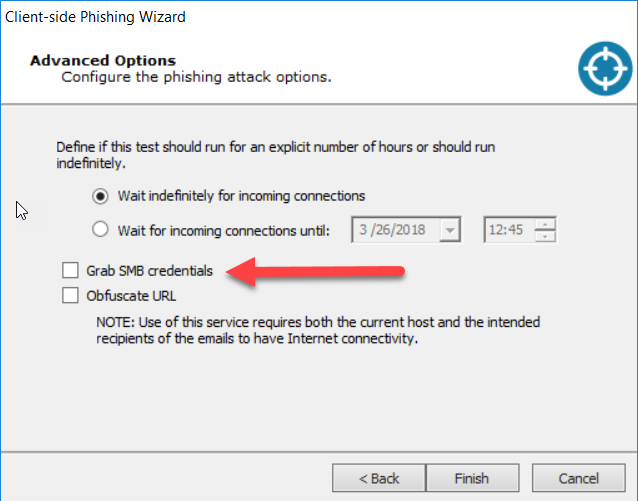
Core Impact 18.1 release brought a ton of streamlined enhancements and new capabilities to the client-side vector in general, and phishing in particular. To be clear on terms, I consider phishing to be inducing a target to follow a link presented in an email for the purposes of capturing credentials for some system or another. Using an email to get a user to overtly run a compromised attachment or covertly execute an exploit payload falls under the broader client-side umbrella.

I want to take a few minutes to walk through some of the changes and new features in the product - if you’ll indulge me.

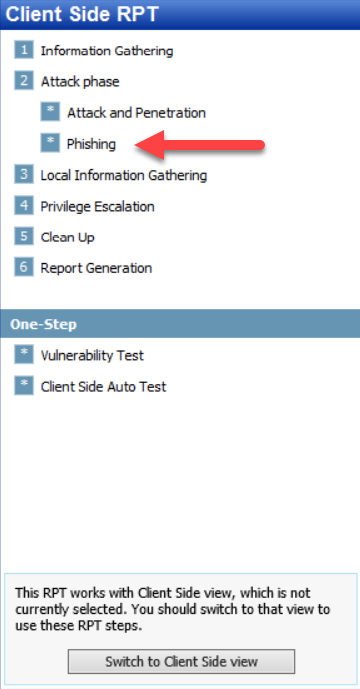
First off, I want to point out that we’ve gone and separated the Phishing Attack Phase RPT wizard from the Attack and Penetration RPT for Client Side.

Image
client side rpt-phishing

Text

It’s a simple enough change, but when you just want to do some casual (or serious) phishing, you won’t need to wade through all the screens of the Attack and Penetration wizard to get there.

Next up is a major functional change. Prior to Impact 18.1, we could clone a SINGLE page (and all the images/javascript/style sheets associated with it). If the user tried to follow a link besides the login, we were kind of out of luck. Now, Impact can stand up to an Impact-Integrated Man-In-The-Middle proxy on any deployed agent that lives on a system without an existing web-server on it. This enables us to sit in the communications path to observe all the back and forth traffic, including login credential exchanges. Impact uses a heuristic function to identify probable login credential form fields and extracts them for you.

Image
client side phishing wizard

Text

The first option, Web Page Redirect doesn’t perform any cloning. It doesn’t attempt to collect credentials. You might be asking yourself “Well what good is it, then?”

Web Page Redirect collects statistics on “Opened Email”, as well as “Clicked on Link.” This enables you to conduct no fuss, no muss assessments of susceptibility to a phishing pretext, and then direct the unlucky participants who clicked on the link to remedial training.

Why would you want to do this instead of the amazing Web Page Clone? There are circumstances where you DON’T WANT to run any risk of collecting credentials from your users. This is the tool for those circumstances.

Now…if you WANT to collect credentials…then you’ll want to use the Web Page Clone.

Image
phishing wizard-web page clone

Text

The Web Page Clone will take a website reachable from the Impact workstation and perform a Man-In-The-Middle via a proxy deployed by an agent. We *can* choose to not save captured form data like login credentials. There are circumstances where we WANT to retain nothing of credentials entered, but still log that the user provided the credentials.

You can also perform a redirect after capturing a credential, just like when you do a Web Page Redirect.

Deeper in, you can opt to leverage a number of advanced configuration options.

Image
phishing wizard-advanced options

Text

One of the more powerful options allows you to inject a javascript that will attempt to force an NTLM authentication against the agent hosting the proxy.

Image
phishing wizard-grab smb credentials

Text

Be careful with this, though. Some browsers will pop an additional authentication box to collect the credentials, rather than using the user’s NTLM creds via a challenge response.

We’ve also made editing and using customized templates easier with this release. Impact can now import both HTML emails and .eml format, so you can build your phishing pretexts in an actual email editor.

And one more thing…

Image
phishing wizard-end user experience

Text

You might have noticed this CSV for target data tags… and wondered what it is.

This new feature allows you to bring in custom data to include in the phishing emails.

Just set up a spreadsheet with the field names in the first row. Make sure that “target” is the first column, and that it holds the email address. Any additional fields can fill the subsequent columns.

Image
phishing target

Text

To use the custom fields, use the <%csv:fieldname%> tag like I’ve done below.

Image
phishing wizard-email body

Text

Be careful to close the tag, as the editor doesn’t validate it, and you’ll end up with <%csv:fieldname> in the phishing email if you aren’t careful. Always test your phishing pretexts first!