Getting Started with Core Impact | Command and Control Options
This video discusses Core Impact's connection options for command and control traffic and the importance of understanding how Core Impact agents communicate back to the console.
It's not enough to be able to exploit a box or target—you also have to be able to communicate with that agent once it is deployed. This example explores each of the primary connection options using a Windows target box deployed via a web server.
To get started, go under Agents and select 'Server Agent in Web Server'. We've selected Windows platform, a 64 bit architecture, and the standard local agent.
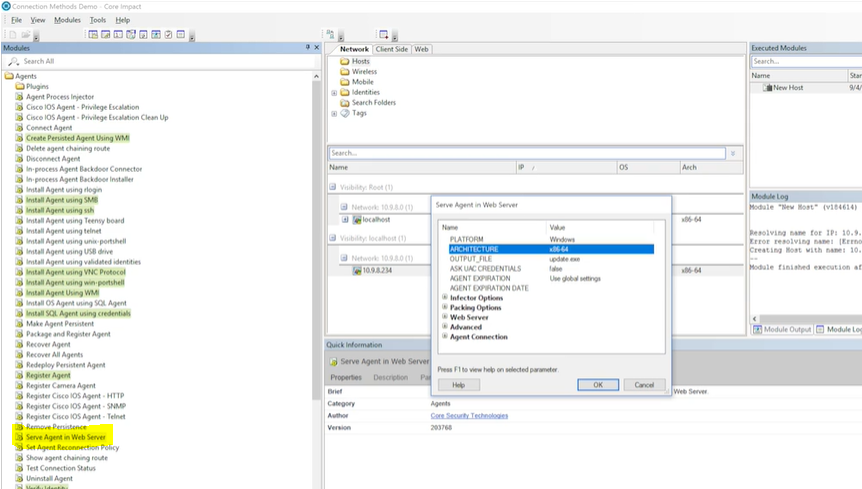
The Agent Connection is the primary area we'll focus on for this exercise.
Connect from Target
To start, we are going to do a basic connect from target using TCP. We can specify the port or let Core Impact choose a high number port. We can also specify what agent Core Impact is going to connect back to. Meaning, we have the capability to deploy an agent from one host, but connect back to a totally different host or agent.
We can also specify a connect back host name. This is important if you're using an external jump box or if an agent is resting behind a NAT interface.
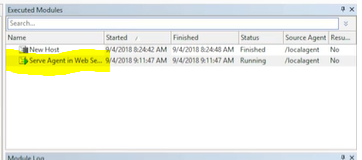
After selecting OK to generate the agent, you can see the Serve Agent in Web Server in the Executed Modules log.
After a brief moment, you'll also see a URL generated in the Module Log. To copy the URL, click on it. Then right click 'Copy' to add it to your clipboard. Now you can conveniently move over to an RDP session.
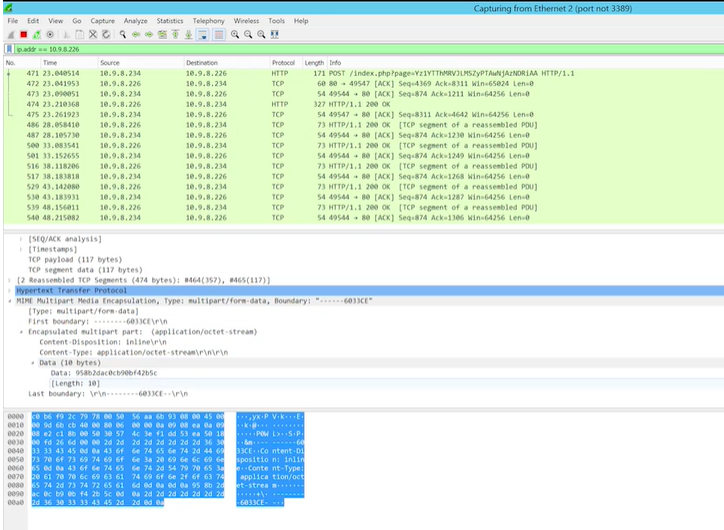
Our demonstrator used Wireshark to capture the communications between the Core Impact station and our target. Once Internet Explorer was opened, the URL was pasted and the file was run. Once completed, you should see activity (TCP packets in our screenshot below) going back and forth under the specified port.

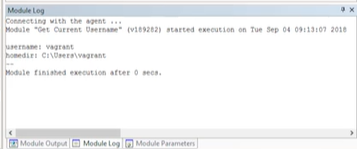
Back in the Core Impact console, you should see the agent on the system. Right click and select 'Get username' to get a username. In the module log, you'll find any usernames captured.
HTTP Channel
In this next example we'll use the HTTP Channel connection method and let Core Impact pick a port. We can specify a referrer and upload a content type.
Again, copy the URL from the module log, start the Wireshark capture, and paste in the URL.
Again, you can right click back in the Core Impact console to 'Get Username.' After uninstalling and deleting the agent again, you can run again to select another connection method, HTTPS Channel or DNS Channel.